The Tree's The Word

Real saddles and miniature sized saddles have one thing in common. They all have a tree, which is the backbone of the saddle. It gives it shape, and keeps it from looking  flat.
Saddle trees can be bought from numerous companies. I still buy them, but I’ve started making my own too.
What you’ll need
Super glue
baking soda
aluminum soda can
scissors
exacto knife
Foil
Body Model
Wire
Making trees doesn’t have to be limited to english saddles. You can make endurance, western, and saddle seat too!
First you need to break out tack catalogs or start googling. You want to have an idea of what you want to create. 
Next strip it of everything. For a western saddle tree, you have to make the gullet, horn, and seat. First figure out how large you want it to be. If you aren’t sure, look at pictures of tacked up horses.
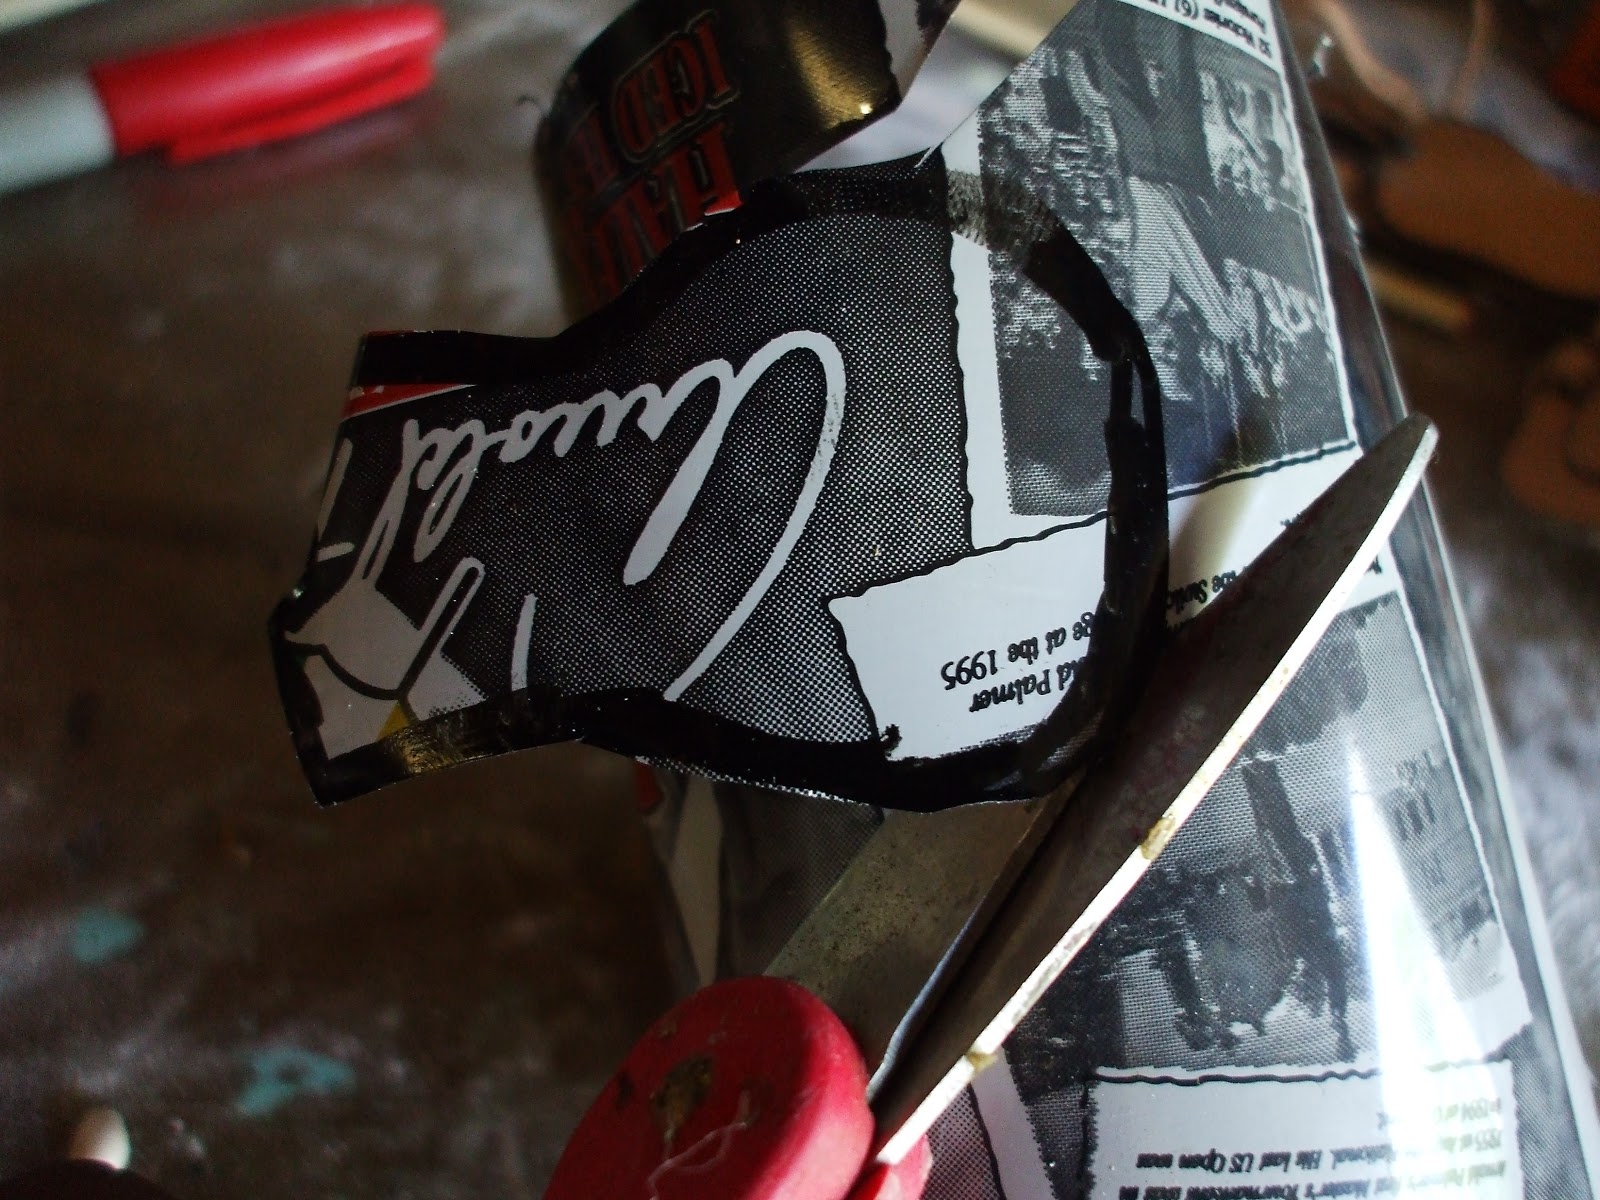
To make the seat, take out an aluminum can. I use regular soda cans. After I drink ’em, I wash’em and use’em for trees. The cans are sturdy and thin.                                                                                                 Trace the general shape, then cut it out.
 Shape it in the general shape of a saddle. Twist it around a pen or pencil to make it “arch” up. If making a western saddle tree, add horn. For the horn,  take out foil and roll it into the general shape of a gullet. Take out a piece of wire and wrap it around the gullet then shape it up if you want.
Congrats, you’ve made a tree!

Arts and School Day 2

Today was yet another Art and School day. This was my last, completely free day of summer, so I did school arts and craft. So here’s another how-to. This one is how to make a calender. I was pretty proud of myself!

Tools Needed:
Frame with a glass or plastic front
Scissors
Marker
Poster board or large piece of hard paper
Ruler
*Optional- spray paint
1) Take your frame,

And take it apart. Do you see a cat tail? You will only need the very back, the frame, and the glass/plastic front. 
2) If you want to paint the frame, go ahead. I bought mine at a yard sale, so I spray painted it black to match the cork board yesterday! Take your piece of poster board and cut it to match the back. Then glue.
3) Depending on how you want to set up your calender, take out your ruler and measure.                                             
4) Then use your marker and mark it up. Then reassemble and put everything back in.
Vala! You’re done and have a home-made calender!

School and Art Day

Since I have to go back to the place called school Monday, I decided to have a school and art day. So here’s a tutorial on how to make a framed cork board. It could be for school or model horses!

Tools of the Trade:

Cork board
Binder
Frame in the size you want
Glue
Scissors

1) First you need a regular frame.

2) Take it apart.
3)These are the only parts you need. You just need the frame and the back.
4) Next measure and cut. You want the piece of cork board to be the same size as the back.
5) Now just put the piece of cork board in first, then stick the back in and fasten it. Done! Now you have a cool looking school board or a model horse one.

It's A Prep

Today I didn’t have a ton of time to work on models so today was a prep day.
After exchanging my can of primer for a new one (the one I had bought didn’t work), it was time to work.

Then it was time to start spraying.
The end result.
The wolf, well he is now a Native American Indian Dog. Researching, they are an actual breed, designed to be like and act like the actual ones from years ago. 

 My soon to be foxhound hunter pony. I’m thinking buckskin as his color.

 Reining horse. I got him at a yard sale (the best place to find bodies!) and chopped of his hair mane and tail, then sculpted a new one. He will be painted eventually. No idea though about his color….