How To Make A Miniature and Regular Sized Ornament

How to make a miniature Harry Potter miniature and a Regular sized winged keys
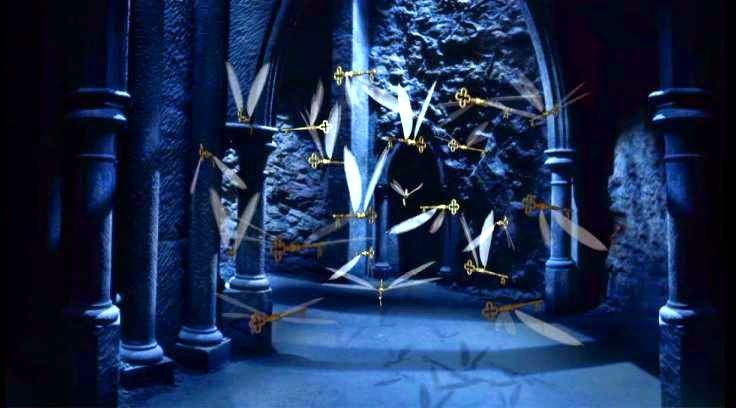
Picture from here
So this year I have two trees to decorate. One is a dollhouse sized on and the other one is regular sized. So I thought why not make them the same?  After that I thought why not make them fandom inspired? I decided to have the first one be Harry Potter themed. The keys were from the first book/movie. :)
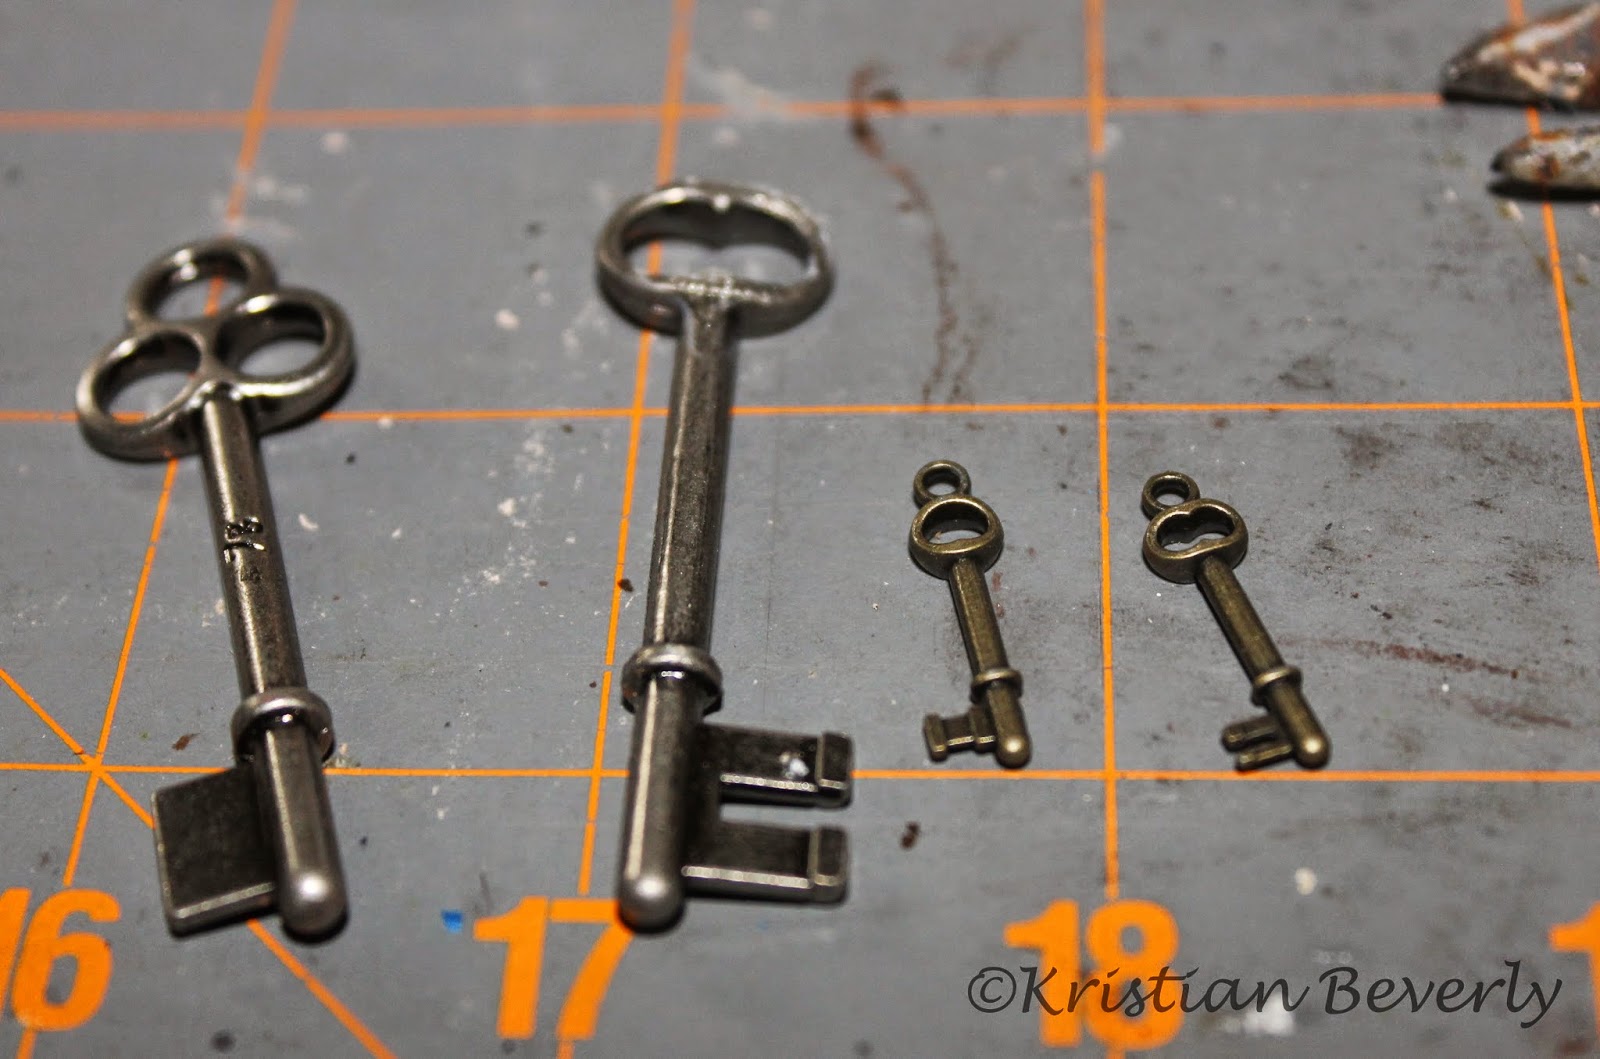
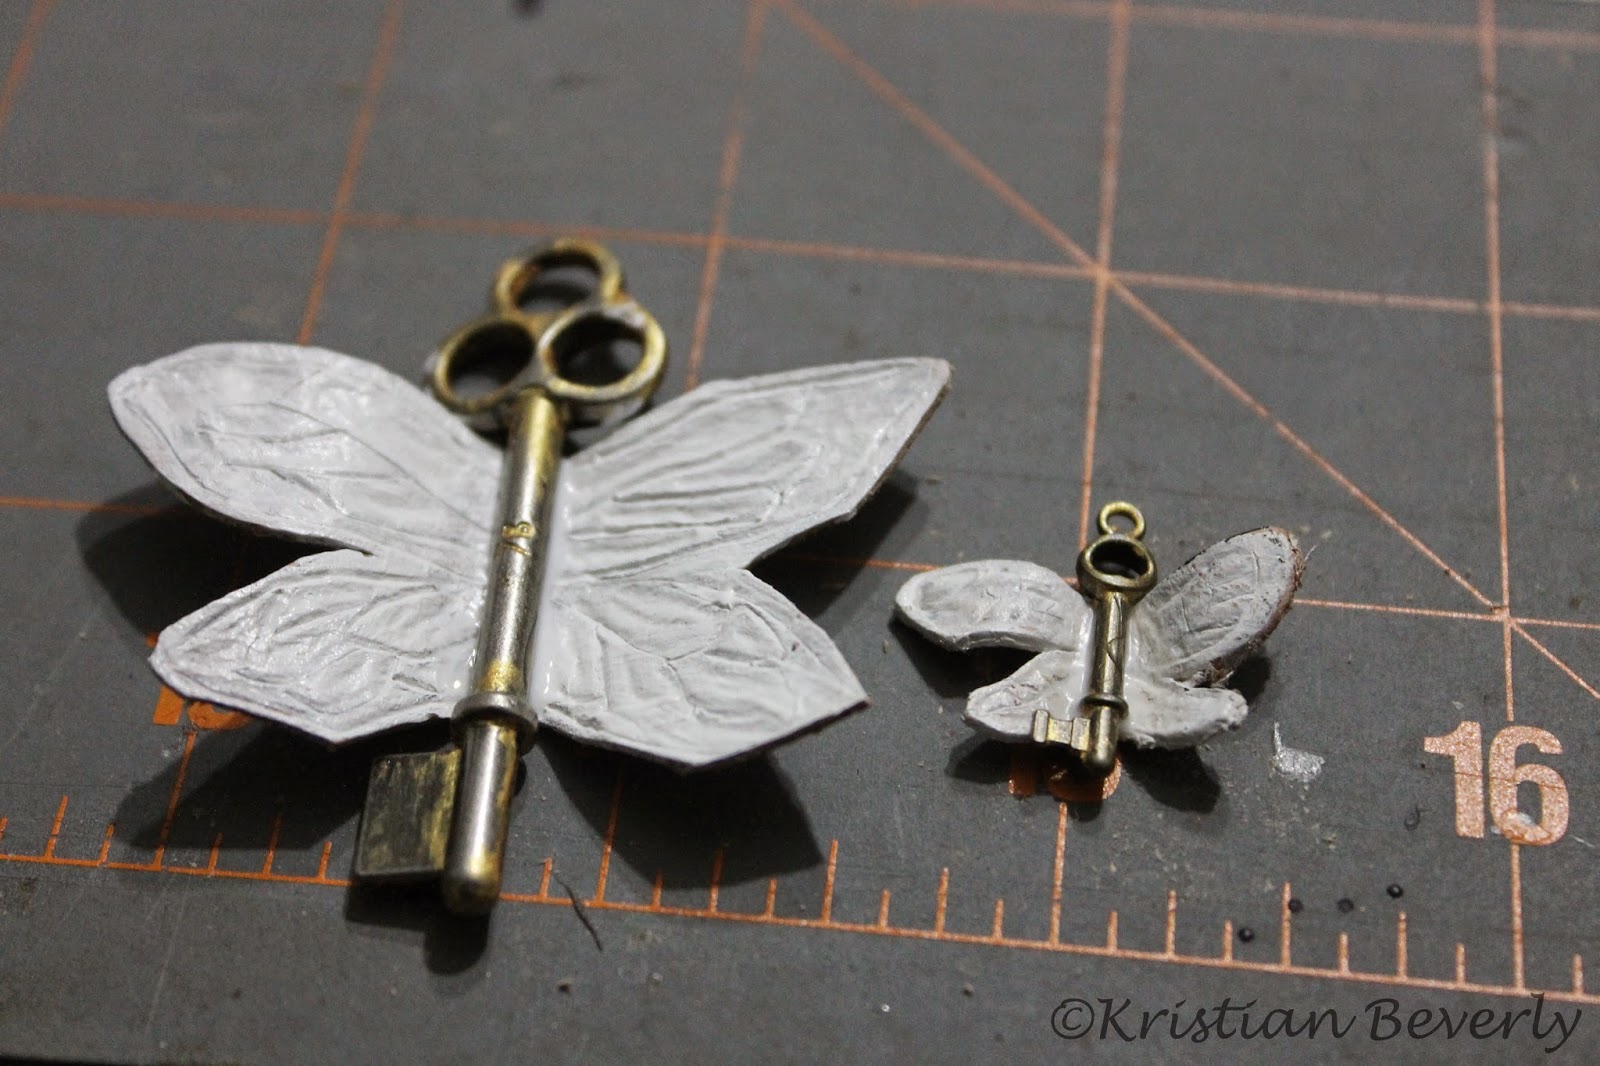
First, I bought keys from my local Joann Fabrics. 
I made sure that the keys for the miniature one were tiny. The regular sized one can be any size, but I bought large ones. 
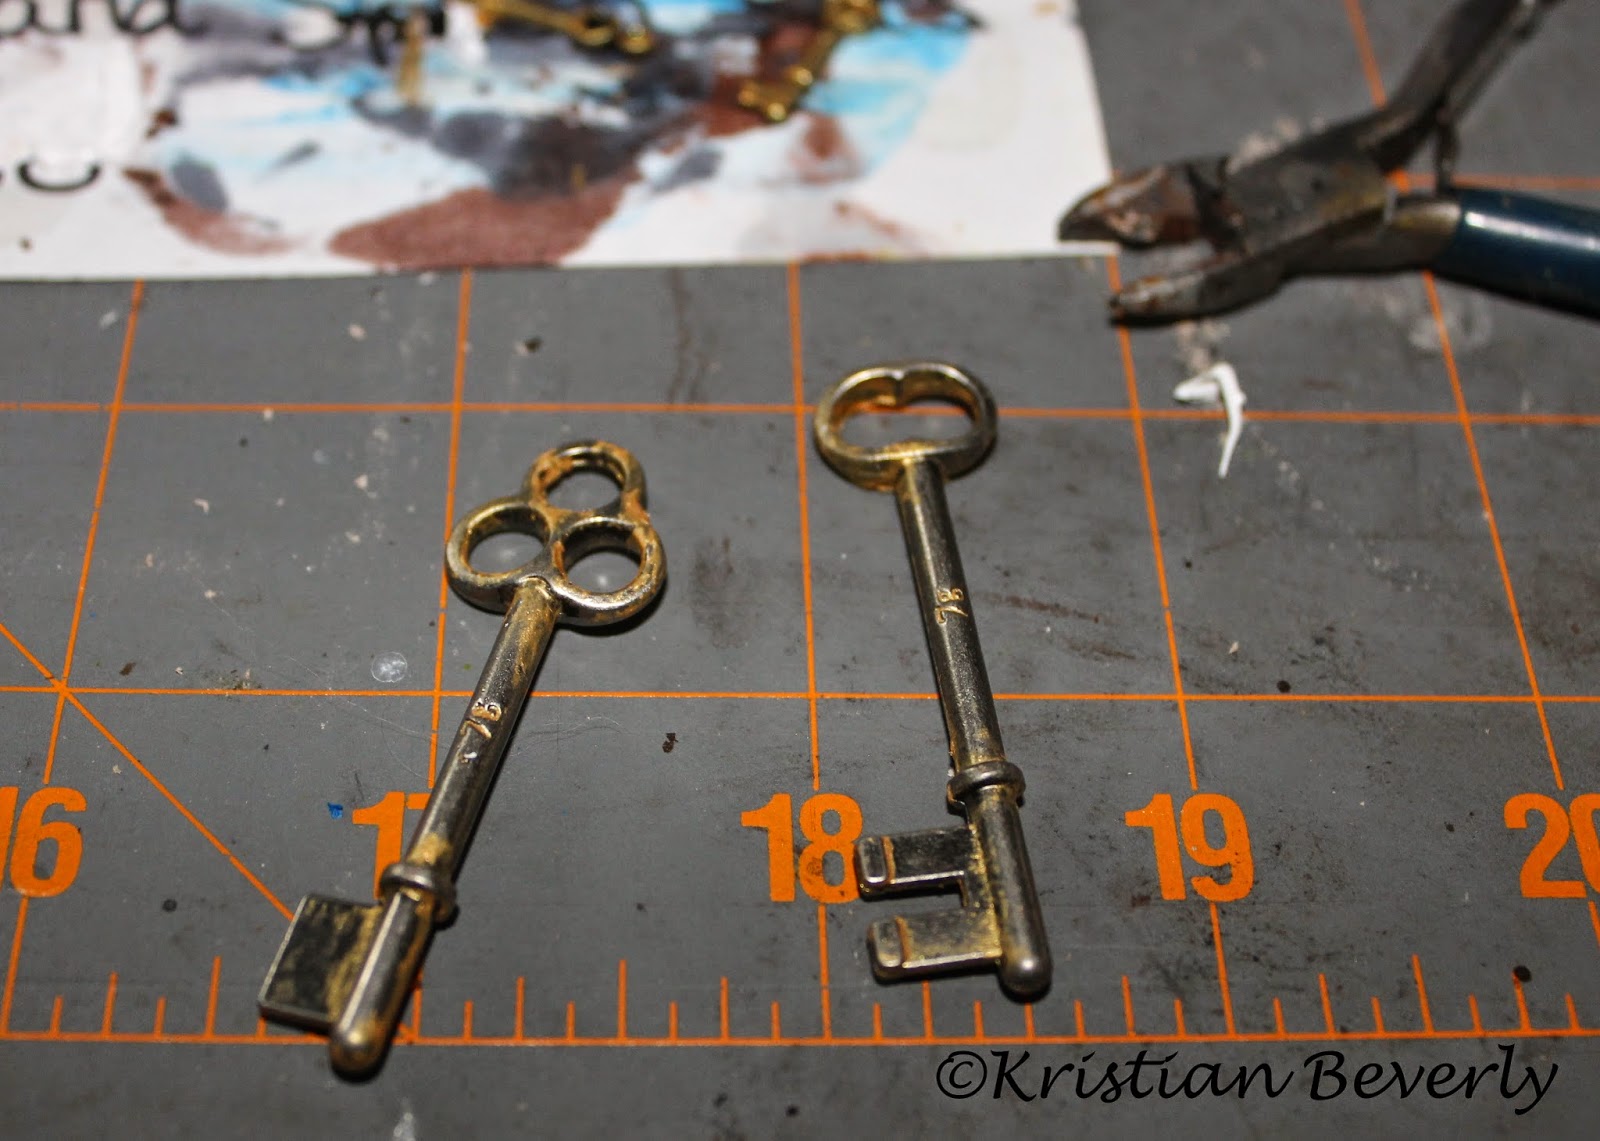
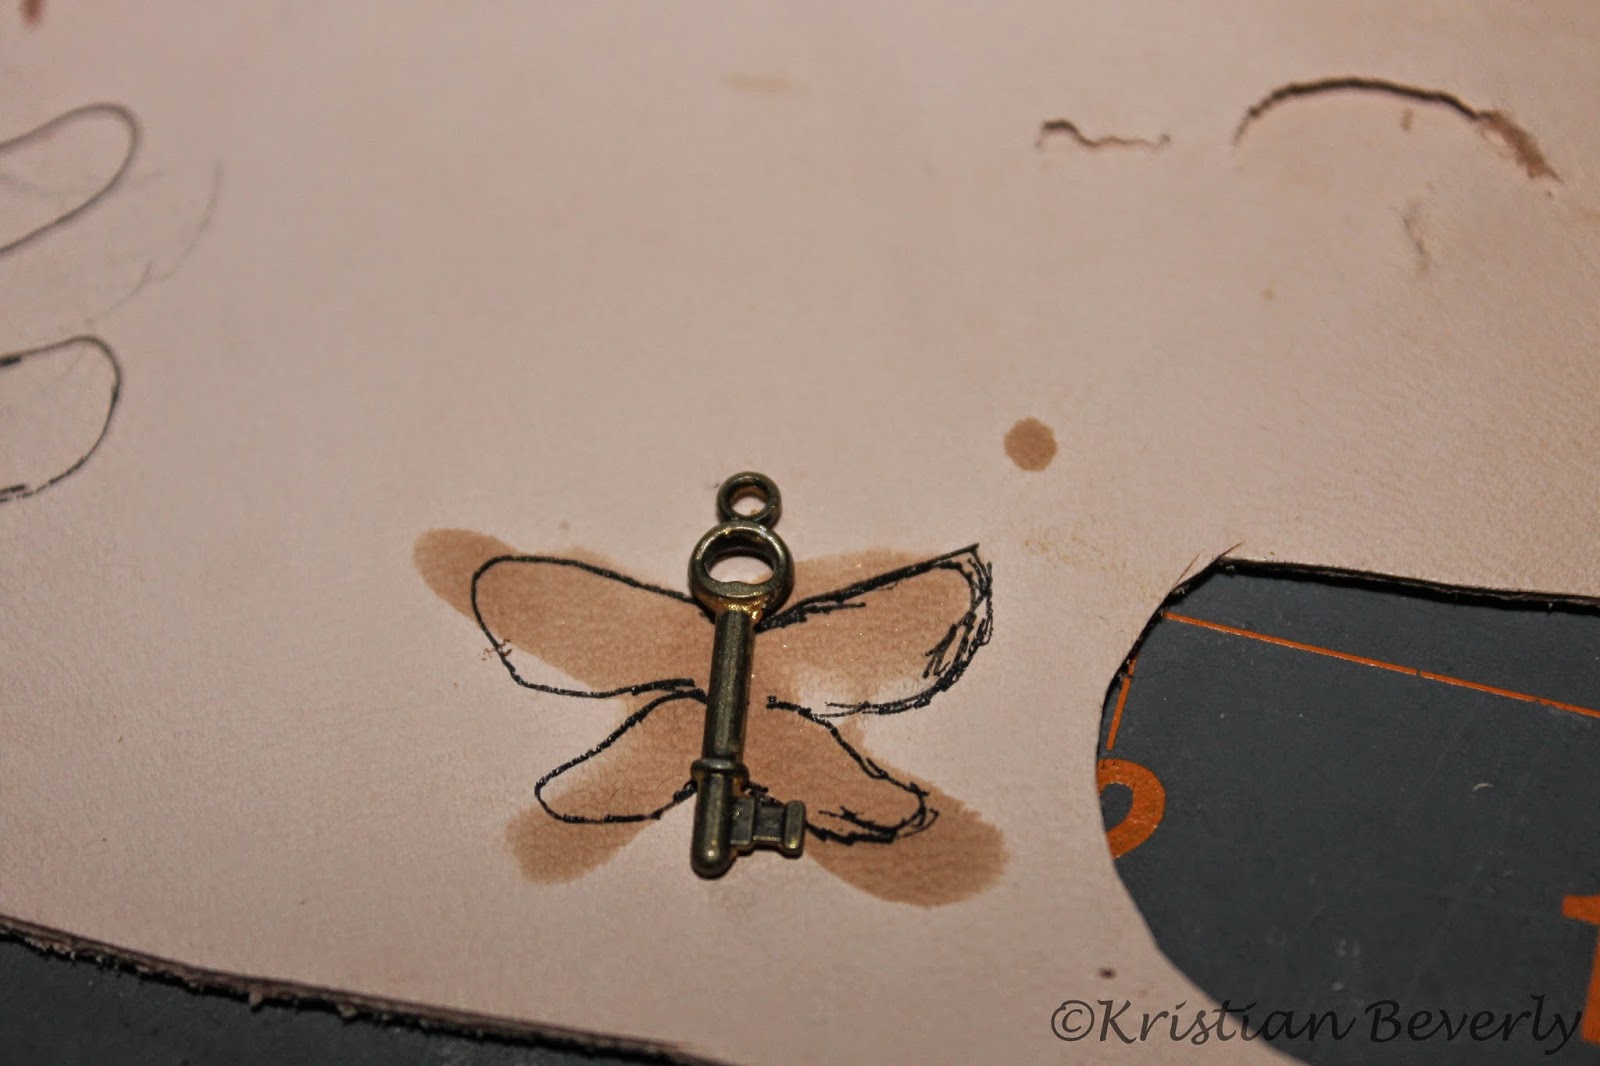
I painted them gold. Then I wiped the paint off because I wanted the keys to have a rustic feel.
From there I grabbed a piece of tooling leather and drew wings. I wet the leather but did not cut the piece out so it did not stretch. 
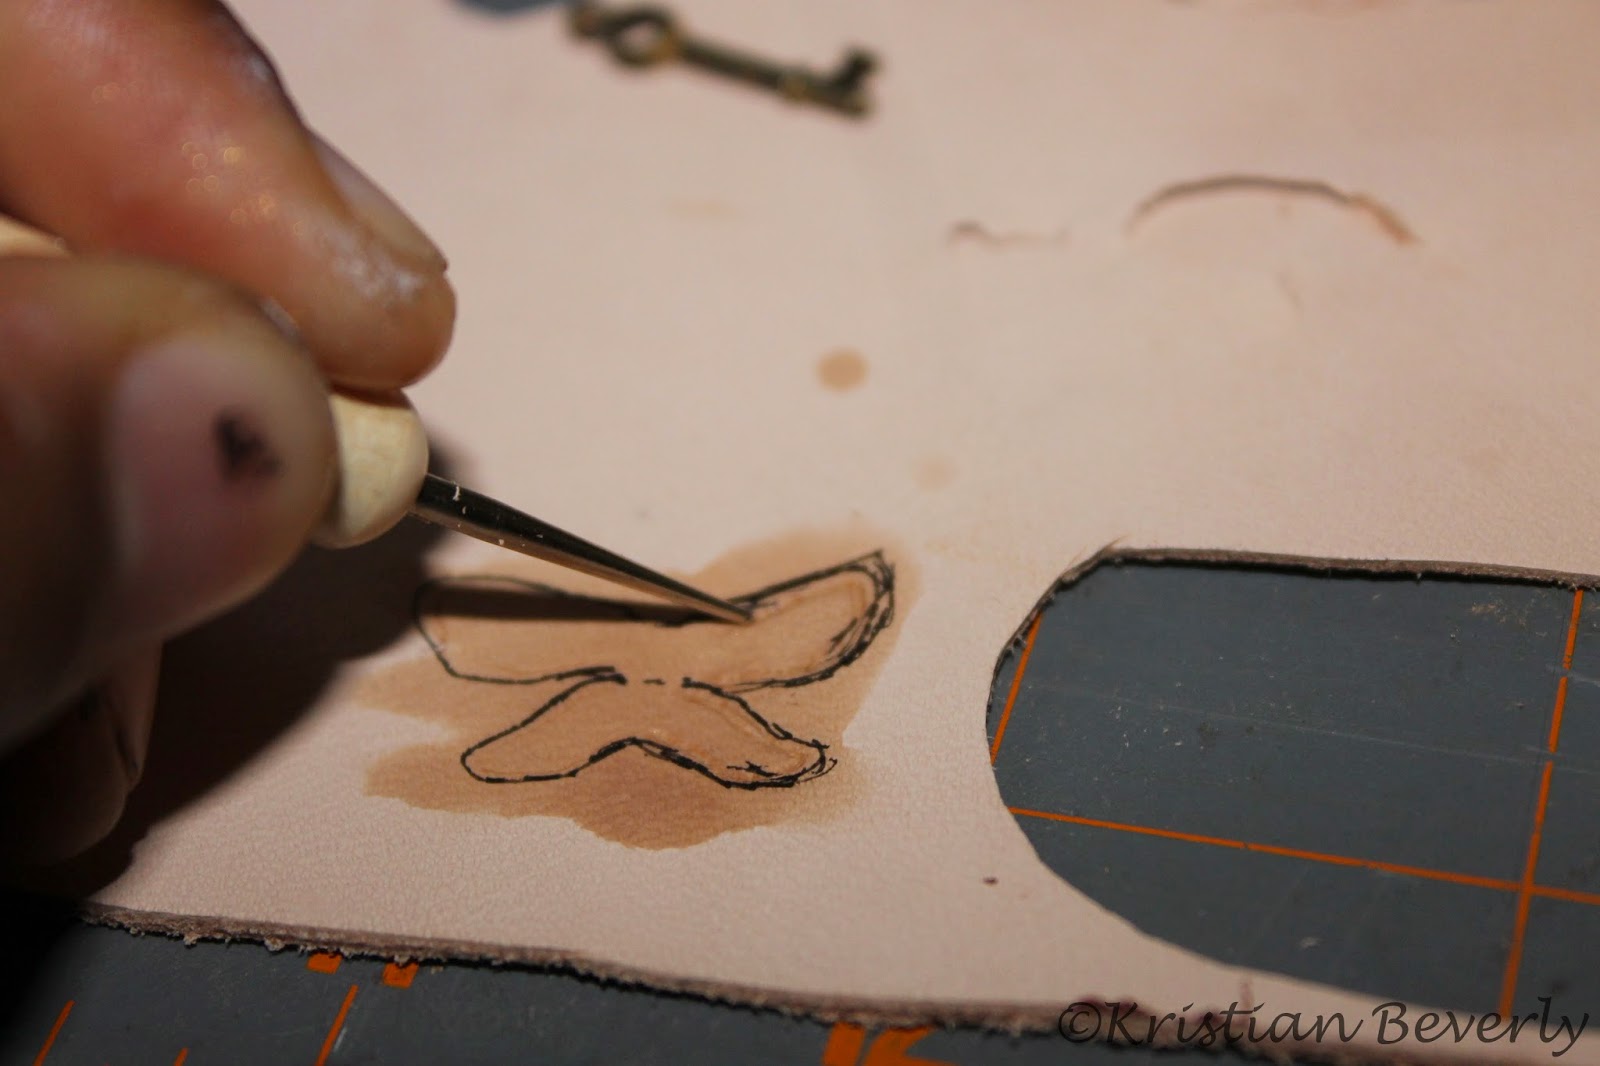
I cut the wing design I wanted with my exacto knife. I didn’t cut all of the way through the leather, just the first layer.
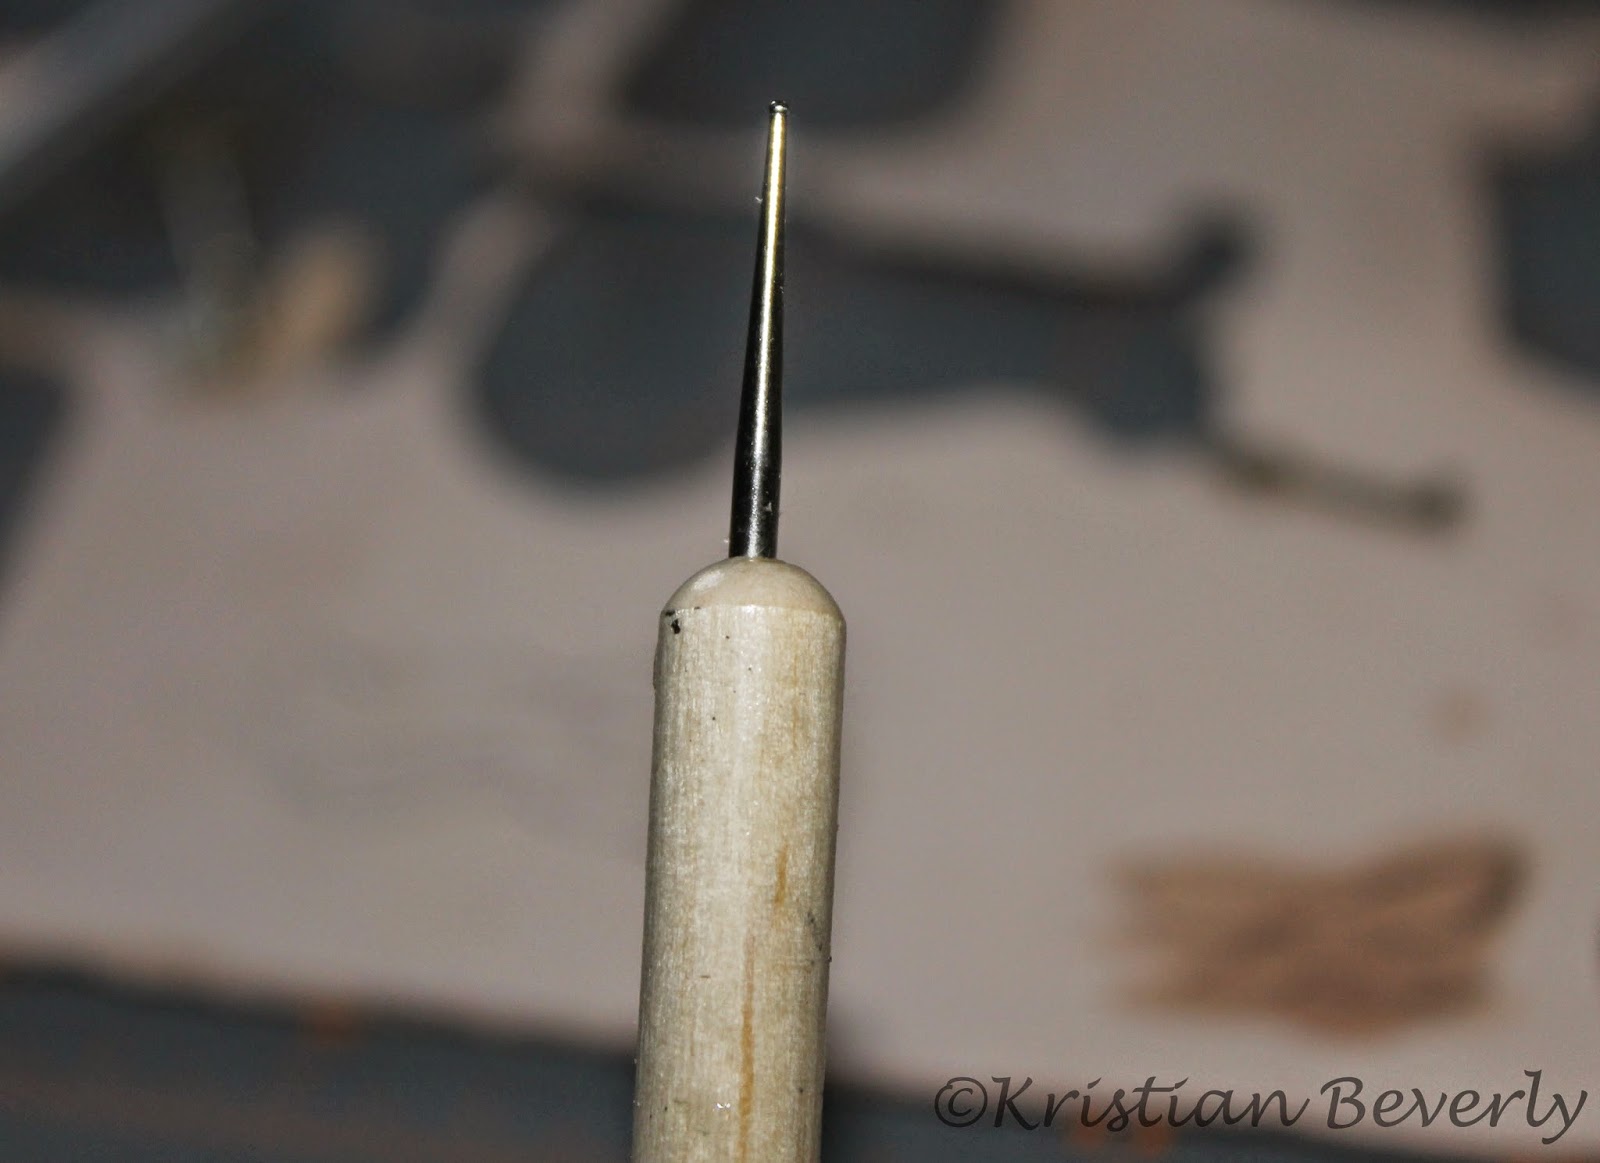
 Using my stylus I pushed, outlined and made impressions into the leather until I was happy.

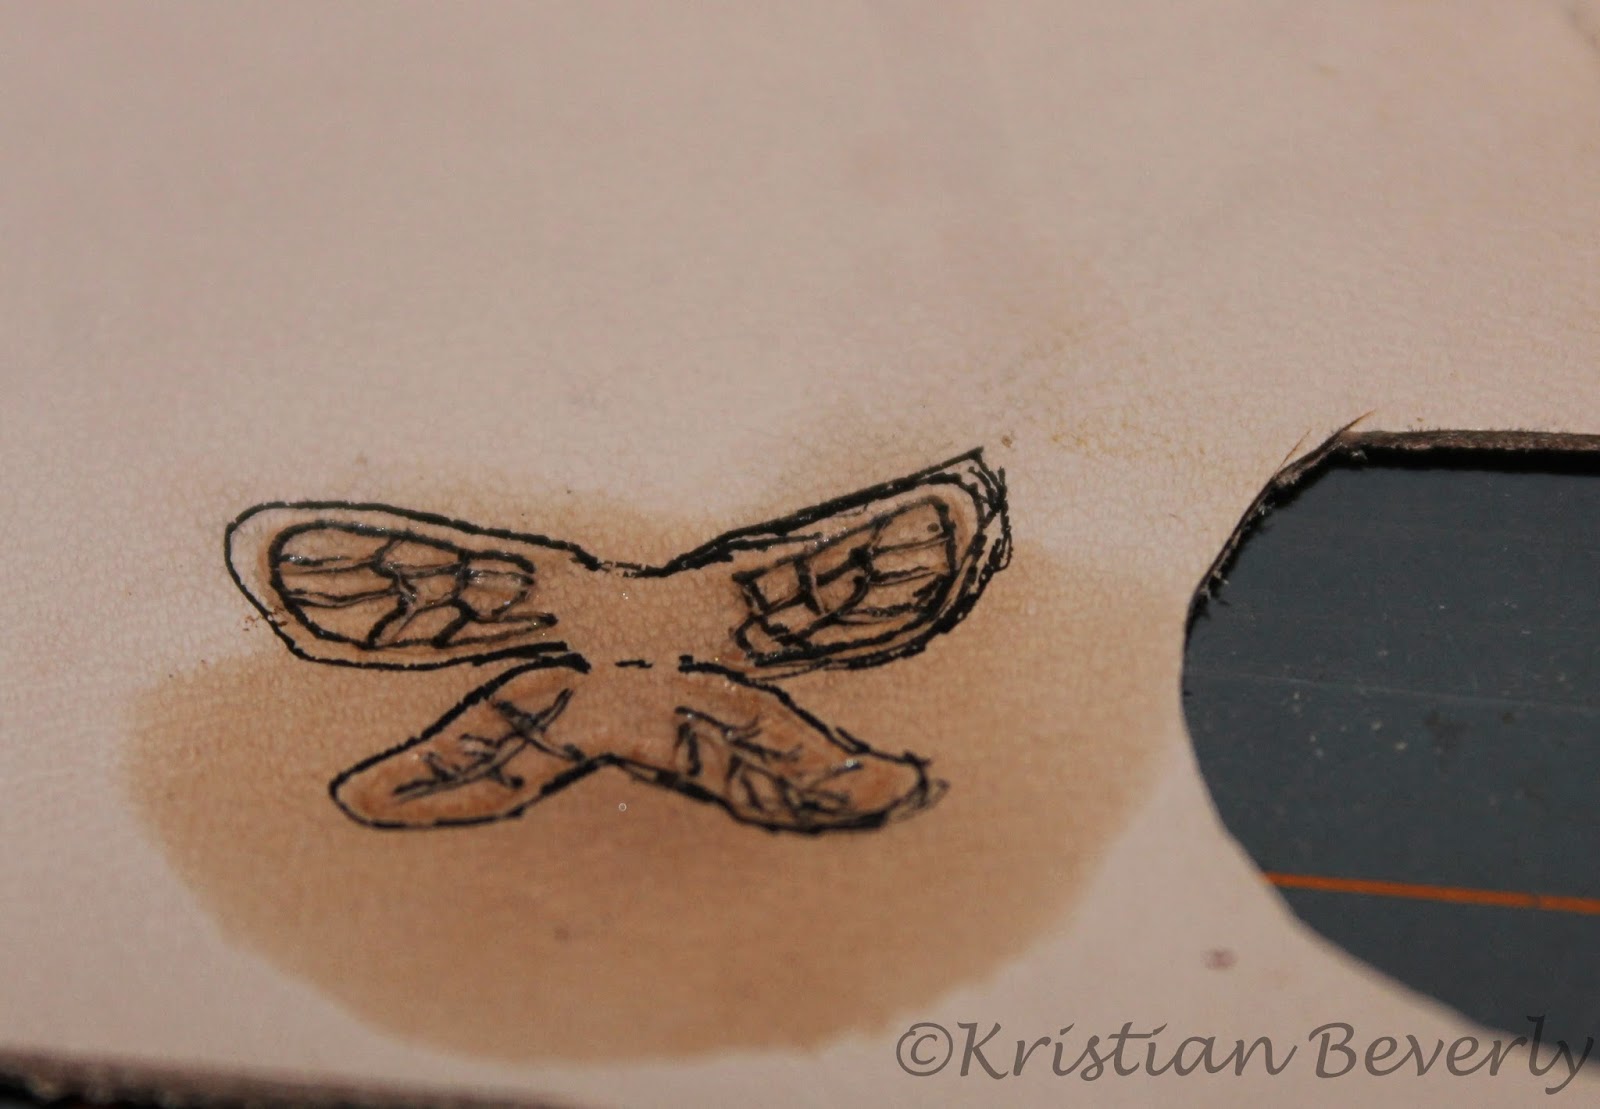
I cut it out. I also wet the wings again so that I could ‘sculpt’ them into the shape I wanted them to be.
 Then I painted it white, and then glued the key to the wings.
Done! Add a piece of wire and they can be stuck onto a tree. :)

Tip Of The Day-Organizing Nan Cards

I love back to school time. It’s not because of the actual school part. Instead, it’s the sales. I load up on model horse items during the season. Not because I actually have a plan for it, but because it’s cheap. You can get tons of pencils and pens for dirt cheap. I lose my pens like clock work, so it’s nice for me to load up on them.
Anyhow, I guess there will be more than one tip in this post.
The real post is how to organize those nan cards. For some projects I  think the DIY part saves you. For this one, I don’t think it does. It’s easier to just buy it.   But to organize Nan cards, plastic index card holders are the best. Nan cards are about the same size as an index card so it fits in the container. You can buy them for about 4$ off of Amazon (link). I bought mine for a dollar at my local office store( back to school perks!). So shop around.

Picture from www.oempromo.com

Now the one I bought has little dividers where I wrote performance, collectibility, and halter. I sorted my cards that way. If you have a ton of NAN cards, then you may need a index card holder for each separate division. If you have a horse that has plenty of NAN cards that warrant a separation, then get it its own separate card holder.
So that’s the tip for today, hopefully it helps. :)

How To Make A Complicated Zombie Doll

So I’m sitting here on campus with a nice break before my next class, and I was trying to come up with a post that wasn’t so college-y. Eureka!
There will be pictures of mutilated and creepy dolls, so if you don’t like or are creeped out by that stuff, this post may not be for you.

The Semi How To On Making A Complicated Zombie Doll

I love to make zombie dolls, since they are a ton of fun to make because you throw all realism out the door because, well, they’re zombies. So when making a zombie doll, you literally can not mess up. There are no rules because zombies are not real. 
Last year, I made a how-to on making a simple zombie doll. I followed the same first couple of steps, like making the eyes sink into the head .

 That’s when this how-to took a different turn.

I used this tool (whatever it’s called, but it’s found in the jewelry section),

 to cut chunks out of the zombie’s face.

Then I dremeled the plastic hair off of the doll’s head. It looks pretty sad, doesn’t it?

I filled in the holes I created (or accidently created) by sticking modeling paste into it. It leaves a rough surface instead of the scar being clean, which could happen with using apoxie. Plus, it dries fast, which works for the very impatient me.

After that, I gave the whole face a base coat of acrylic paint (Fawn). As with every project, the doll will go through an extremely ugly stage.

Then I followed closely to my last how-to in using pastels to shade.

 I added the black, the fake blood, and such. Painted the eyes with a rim of pink on the outside.

Then came the hairing. 
When I was small and haired my first breyer horse from the hairing kit, it looked horrible. 
But that same technique is how I haired the doll.
I took a swatch of the hair, dipped the tip in glue, and rolled it in my fingers so that it came together into a tip and stuck it to the doll’s head. Go from the out

side and work yourself forward, but only if that’s how you want the hair to be.

The final picture of this lovely guy.

How To Make A Water Bucket Part 3

Here’s the last installment of making your water bucket!

I have alot of magazines. Those are all horse illustrated. 
Horse magazines are the best place to get model horse sized ads.

Throughout the magazines, you see advertisements. You don’t want the full page, that it not realistic one bit. You just need the  logo, like this

or this.

After you have an ad that you like, cut it out, and paste it onto your water bucket. All done!