The Eyes See All

The eyes on horses are the largest of all land animals. They show everything. Fear, excitement, etc.
For models  the eyes are what draw you into the horse. If the eyes look bad, then the model is off. But if the eyes are realistic and done well, they’re the soul of the model horse. So here’s a how-to to paint eyes!
First, it’s time for a online search, or a trip to the barn. Find the color you’re looking for, and make sure it’s clear. If not, you won’t be able to see the shadow.
So here comes the painting!
List of paints that are good to have:

  • Black
  • Light blue
  • Browns
  • Pink
  • White

For the ring around the front of the eye and the pupil I use a artist pen. For me, I know it’ll go on flat and not bumpy.

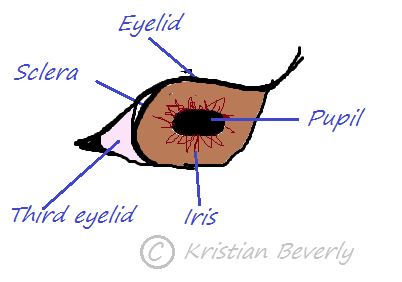
Since I have no idea what the actual parts of the eye is called I googled it. I drew it you will not have to do the same!

For eyes, I always wait until everything but the eyes are done. I do them last.
First I map them out by blocking it in in white.

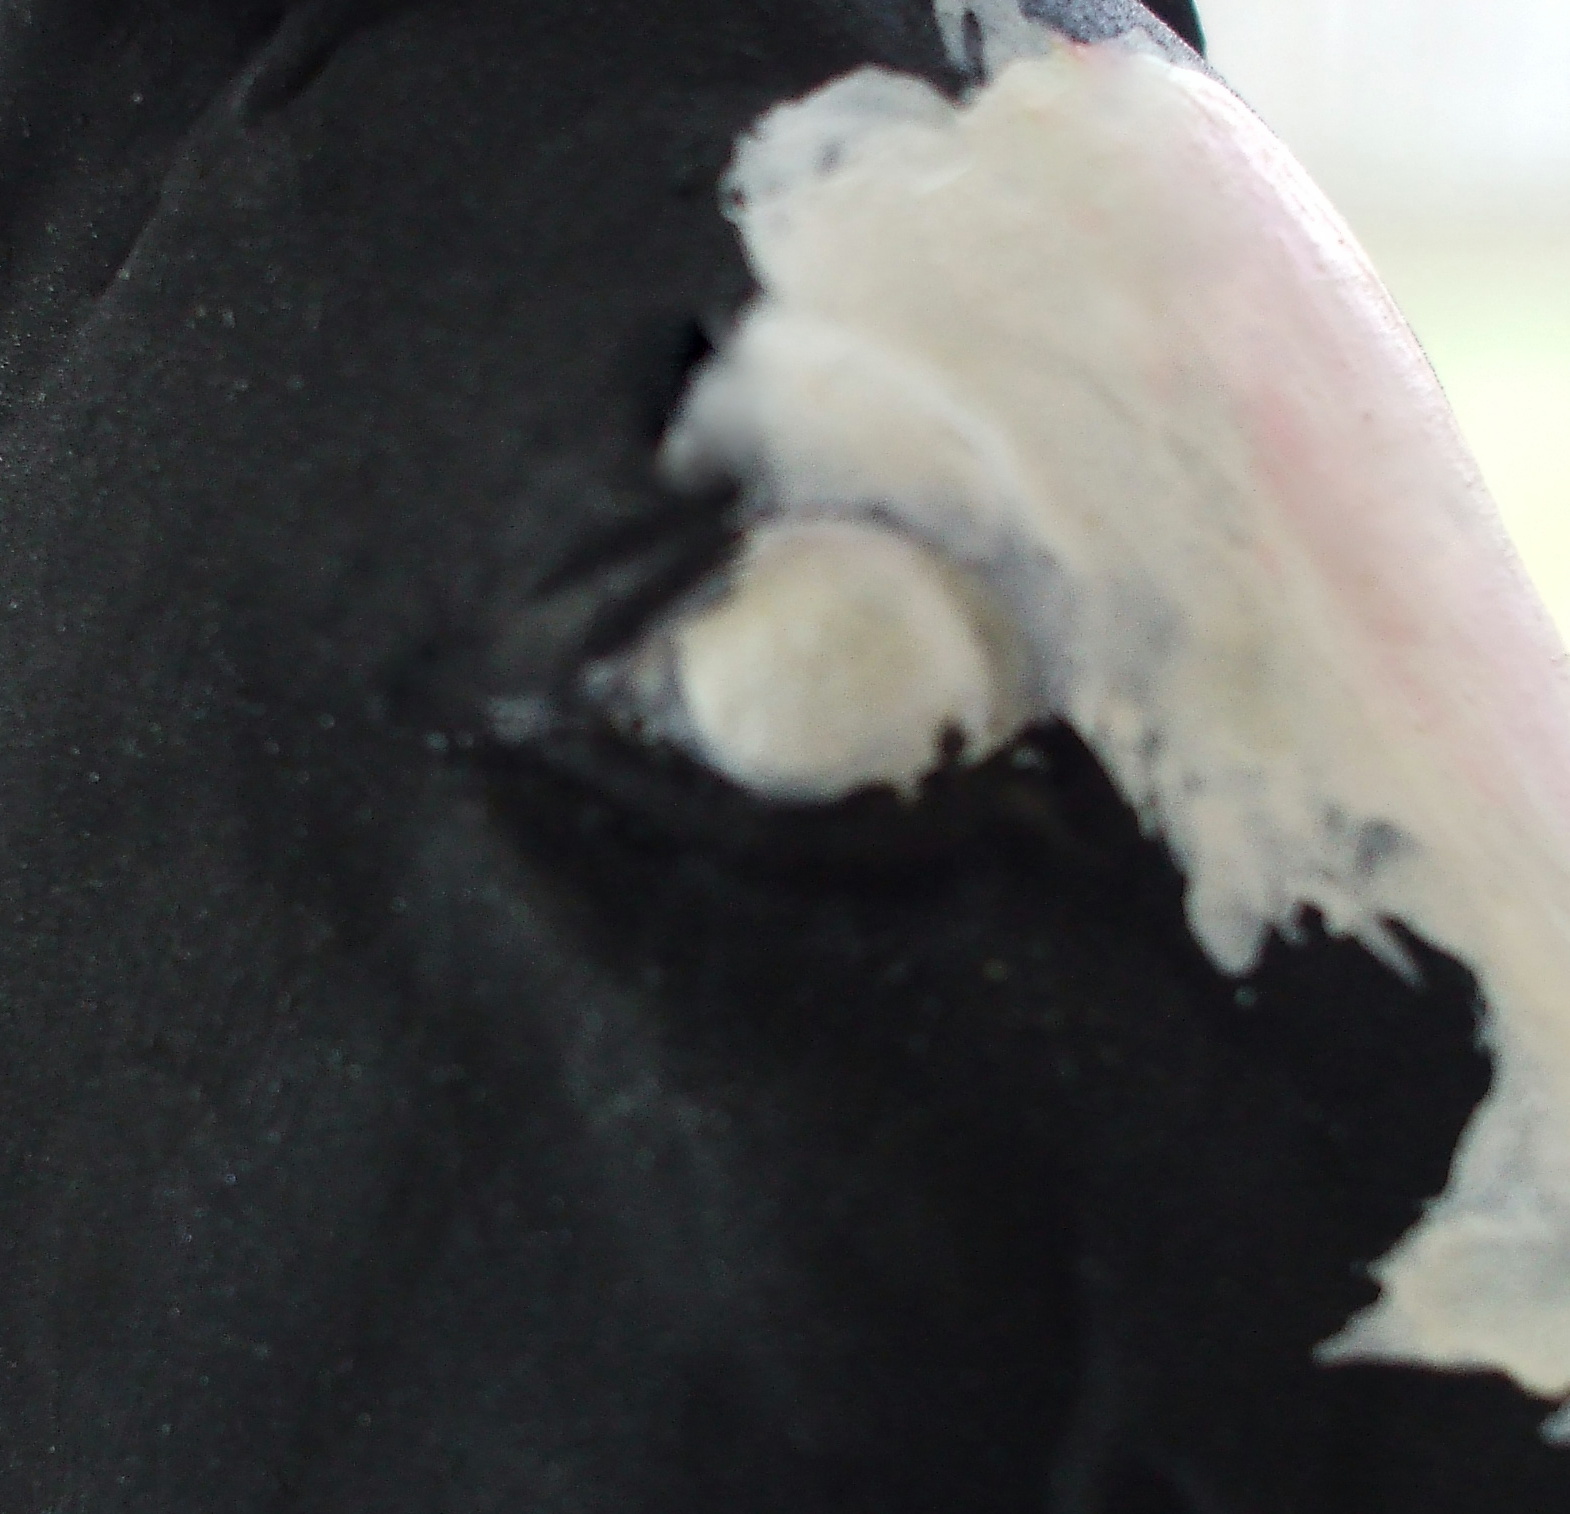
Then I paint a little pink in the corner. You don’t want blood shot red, but you also don’t want hot pink either. You want a soft regular pink. Next comes the iris. Paint in the base color.


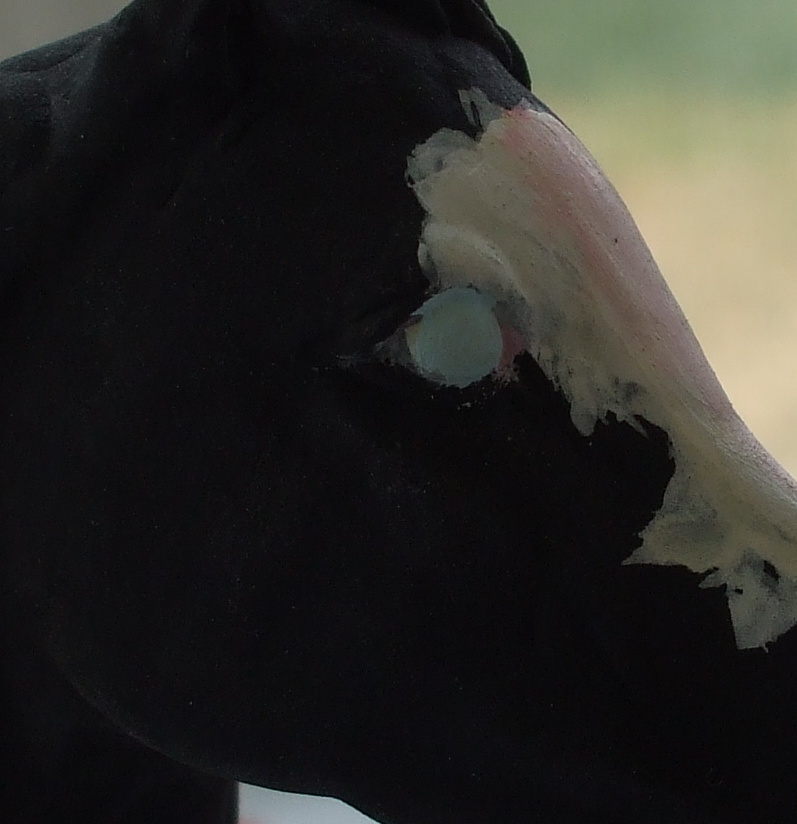
Then mix a slightly darker tone of the base color. Where the pupil will eventually go, I make a slightly larger circle around the section, and blend it in with the base color.

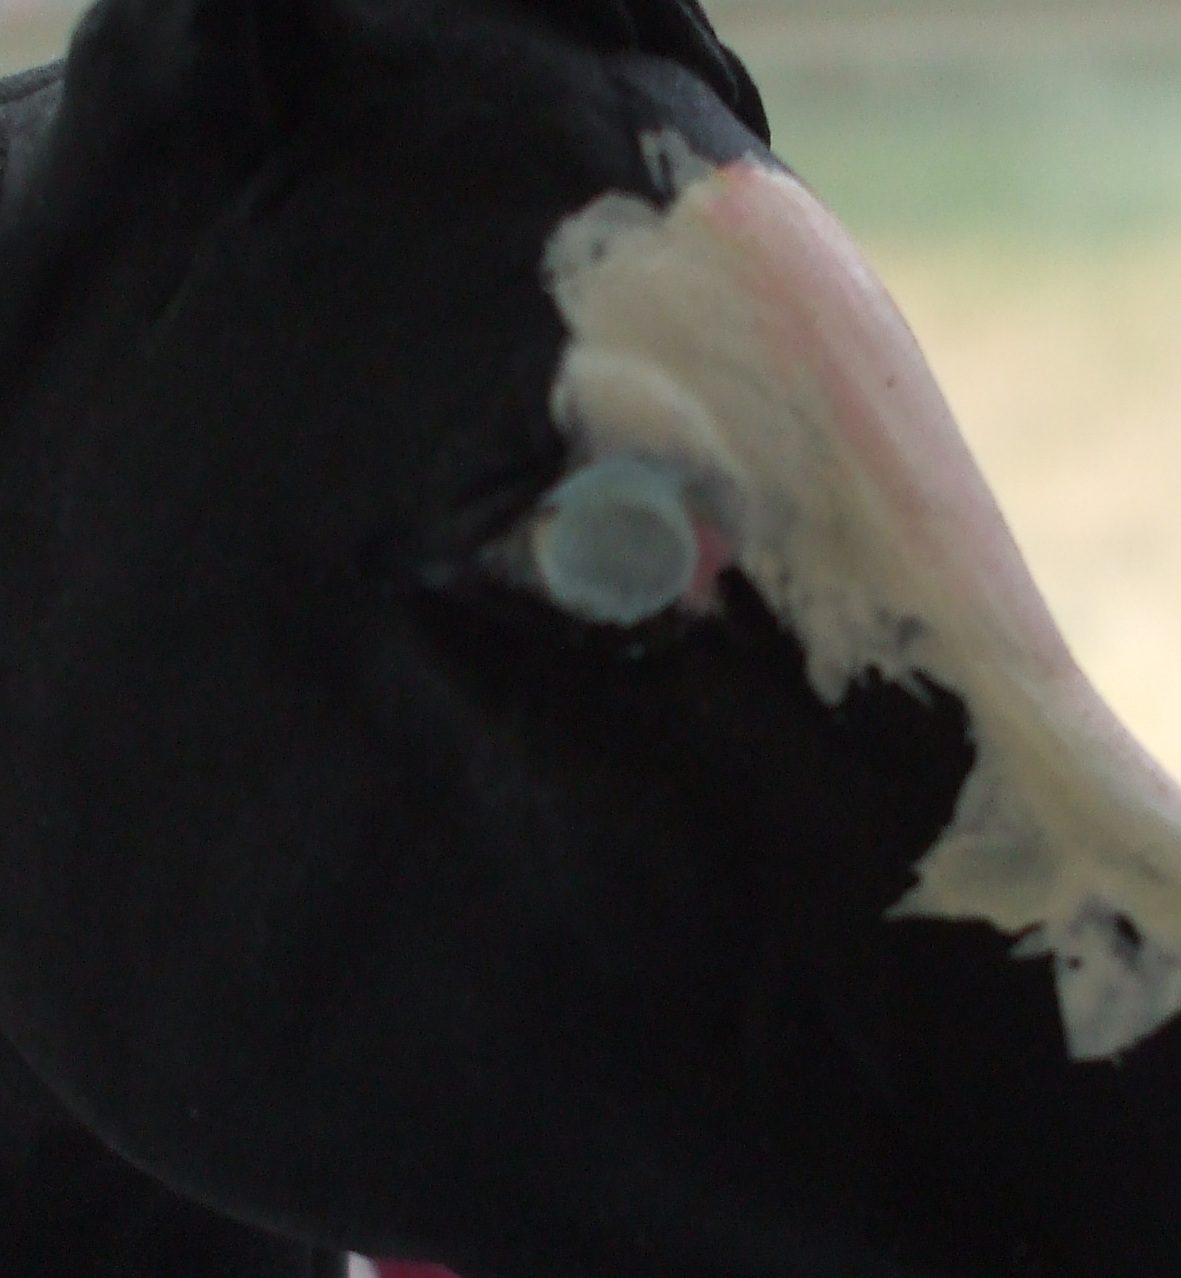
The pupil is last. If using paint you don’t want to paint it thick, but you also don’t want it a runny and it ruins the rest of your work. That’s why I use a marker.
*Make sure the paint is dry before adding the pupil. Mine bled, making the pupil seem huge.

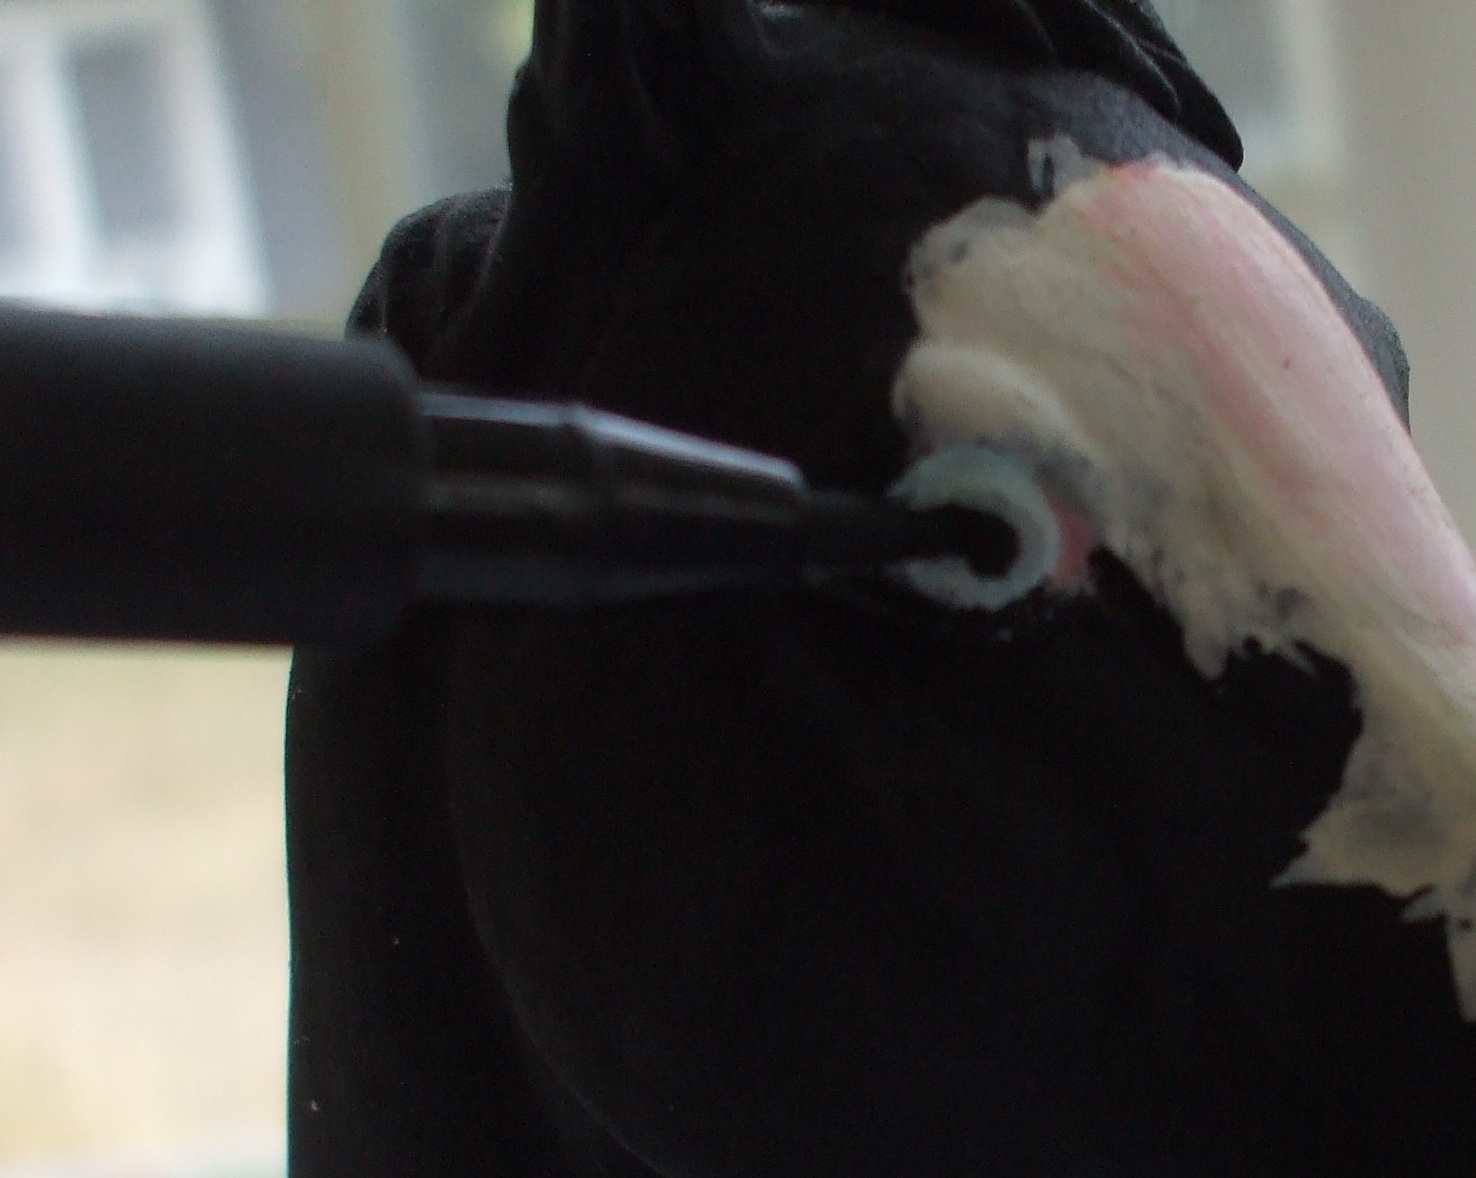
I find the darker color, and draw it in. The pupil is longer than it is tall and it’s in the shape of a oval. Then I draw in the line around the iris.

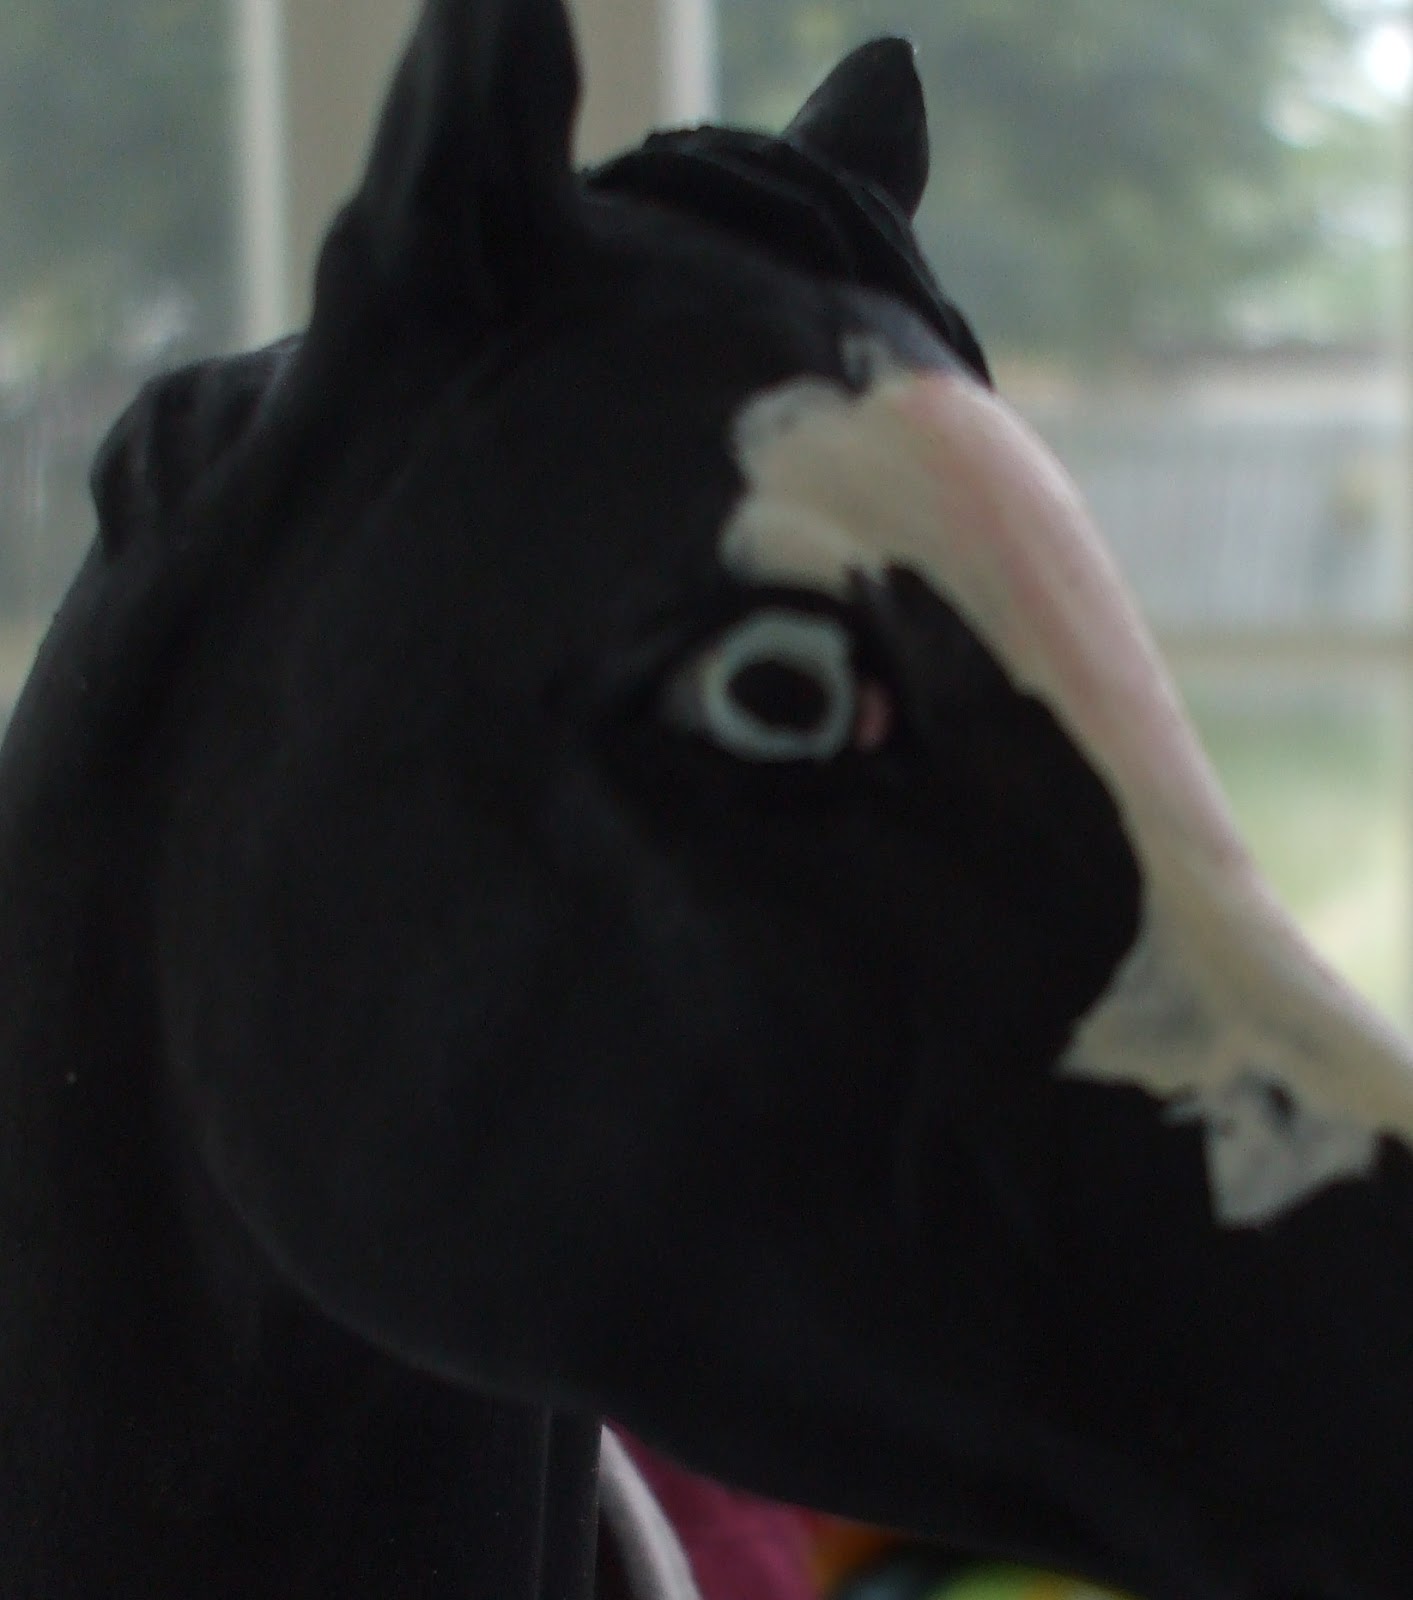
Once it’s done I take out gloss and gloss the eyes so they look “wet” or alive.
Well done! You’ve finished a model and it’s eyes!

Organizing Your Collection

Model horses are like chips. You can never have just one. You keep getting more and more until one day you tell yourself, “I need to organize.” So here’s a how-to on it!
You’ll need a

  1. Binder ( size depends on the size of your collection)
  2. A computer and printer( excel works best for me)
  3. Patience
First, you need to make a form to use for all your models. Here’s the form I use.                                Manufacturer (Breyer, Peter Stone, etc) 
Mold Name and Number
Model Name and Number
Years Produced
Value( Always do this in pencil!)
Price Purchased (if known)
Show name
Gender
Breed
Color
Markings

Notes

I type it all up in Excel, but any typing program should work. Save the blank and start printing! I include a small picture of the model and paste it in the upper corner of the sheet.

In the binder you can organize it in many ways. Breed types, names, series collections, the sky is the limit! 
I put mine in mold name order. I know my models better by mold.
Some models have certificate or other important papers that go with them. Maybe even ribbons that a model has won.  I get a page prprotector, slip the paper  into it and stick it into the model’s page.

Now you can keep adding to your collections without worrying about keeping track!

Fixer-Upper

Repairs. Happens to everyone at some point, whether at a show or at home. My poor cart fell apart for multiple reasons. First, I didn’t make it sturdy enough. Second, I packed it extremely carefully going to my last show, but once the class was done I rushed to put it away and didn’t pack it well, a drastic difference from earlier.
Nevertheless, my cart needs fixed.

First I ripped off the rest of the remaining shafts, so I could replace it with complete new ones.
Next, I measured the new shafts, then chopped.

Then I took out super glue and baking soda and glued. It makes it strong!


Then sanded it until you couldn’t tell when the wood ended and baking soda super glue mix began.

Painted it.

While waiting for the shafts to dry, I took out my modeling paste,

and pasted it into the little grooves in my wheels. Since it dries so fast, I was able to sand and paint it before the shafts were done.

And glued the shafts back on.
Now it’s back together, like new!

The Low Down On Dolls

Ever have a setup that absolutely needs a doll(s) but they stifley sit and bring your setup down instead of up?Well here’s the how to on dolls!
A little remaking can do wonders with dolls.  What you’ll need is 1) a doll (breyer, or any type of jointed poseable doll) 2) a dremel with a sanding piece*  3) sandpaper 4) exacto knife
I’m going to be making a youth rider. I don’t use breyer youth dolls anymore, I use some brand of jointed play dolls that you can buy at regular toy stores. Next time I go to get some I’ll be sure to remember the name! *Just found out they are Paradise Horses dolls
Now here it is.

These are some of the creepiest dolls I’ve ever seen.
See?

I normally repaint the face after I’m done because of these doll’s creepiness, but you don’t need to if you don’t want to (maybe another how-to?) since this is a basic how-to on how to get basic riding dolls.

You need an unclothed doll. See in the thighs how thick they are? Since they’re plastic and not fleshy like us, the thighs and butt need to go.

Take out your dremel. I like to start it on low so the sander can “catch” onto the plastic first, before kicking it into high gear.  You want to thin down the plastic enough for the thigh to be flat, but not so thin it makes a hole in the plastic.

Oops.

Next it’s time to sand the butt. You don’t want to sand off a ton of it, but you do want to sand enough. Take a regular piece of sand paper and smooth everything down.

You can paint the hands to represent gloves .

 If you want your dolls to hold the reins correctly, you can grab your exacto knife and make a slit between the pinkie and fourth finger.

Valla! You’ve finished and now have a horse friendly doll!

*Warning-this how to does call for the use of a power tool. If you’re a minor be sure to ask your parents for permission.