Sand Pounders Part 1

December 7th is remembered as the day Pearl Harbor was attacked. December 8th is remembered for Franklin D Roosevelt’s famous infamy speech that started out as this:

Yesterday, December 7th, 1941-a date which will live in infamy-the United States of America was suddenly and deliberately attacked by naval and air forces of the Empire of Japan.


Prior to Pearl Harbor the USA was divided about getting involved or staying out of World War II. Pearl Harbor changed all of that, awakening and thrusting the United States into a two front war in the Pacific and Europe (Nazi Germany declared war on The United States on December 11, 1941).
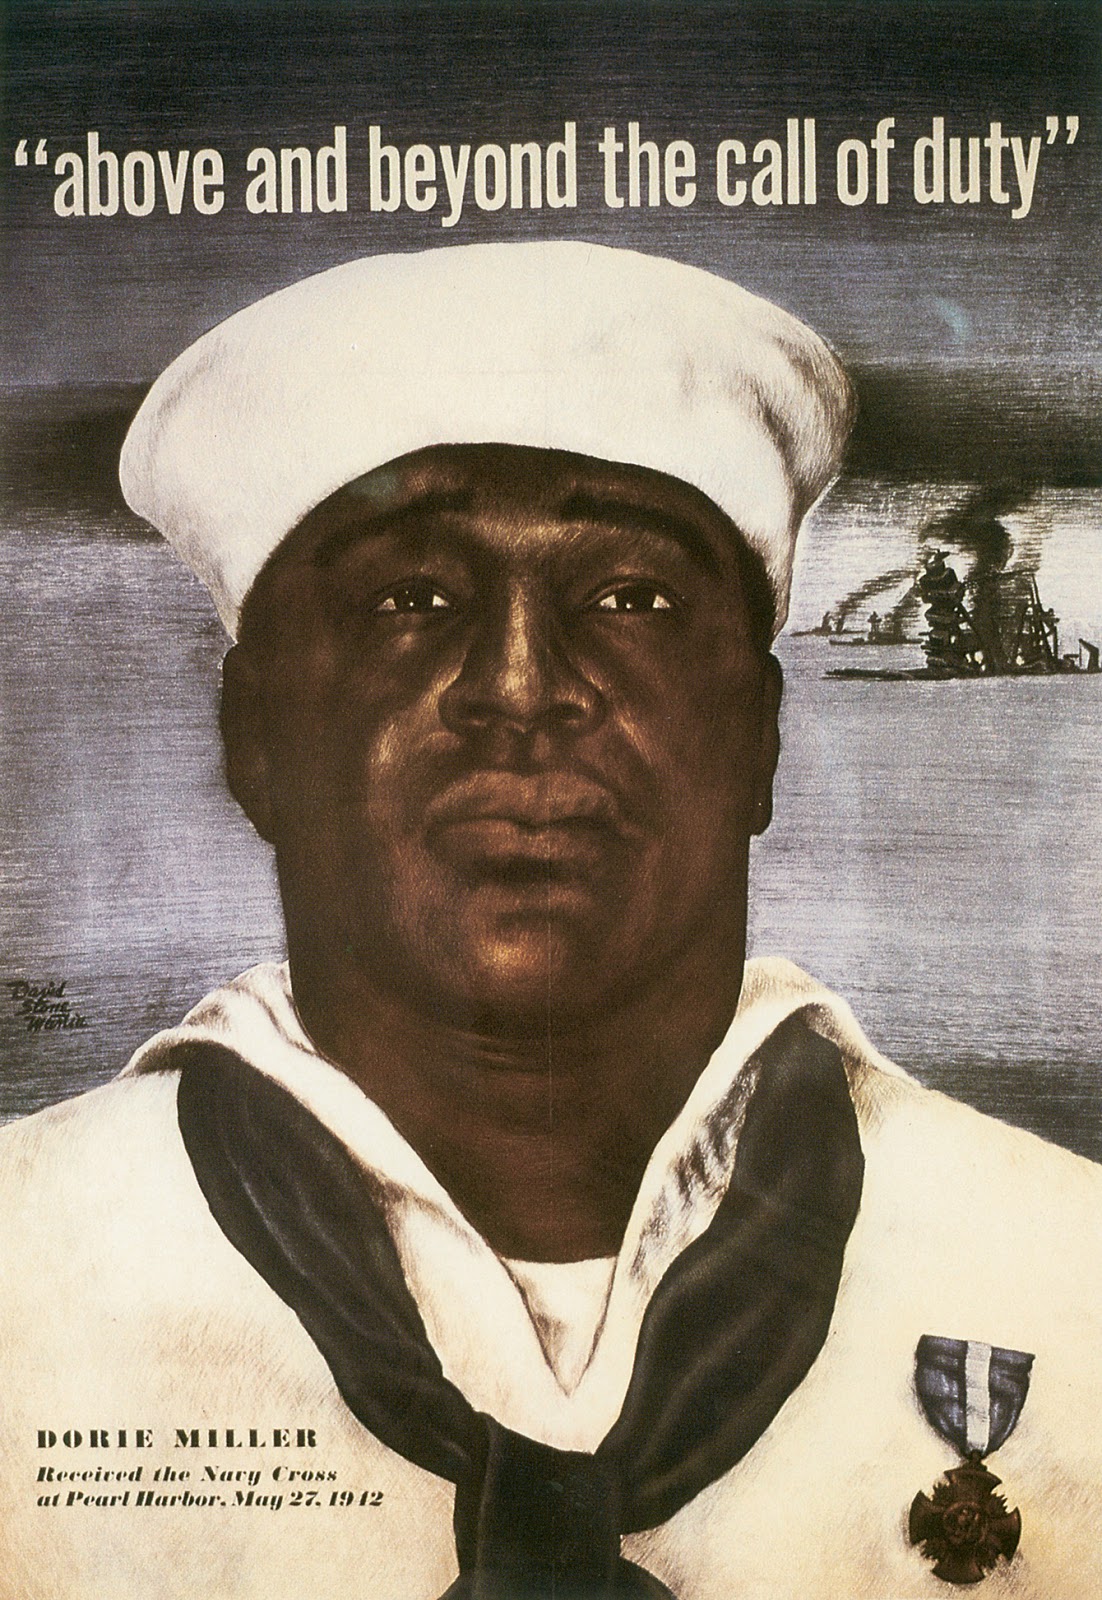
War Time Poster: Doris Miller shot down fighter planes and helped move
crewmates during Pearl Harbor.  He was the first African American
 awarded The Navy Cross. 
A fear of the time was the potential for a coastal attack from the axis powers (Imperial Japan and Nazi Germany). This was cemented in the summer of 1942. During the span of WWII only one enemy face-to-face interaction occurred in the continental USA. 
Source

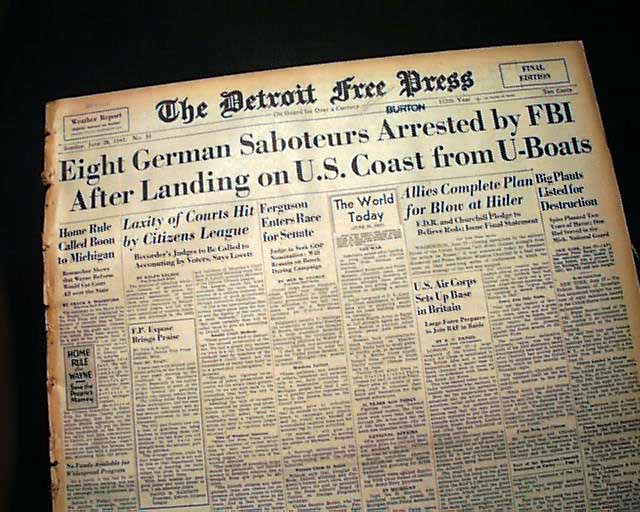
That happened on June 13th in New York.  This is an interesting story.  It was a bit after midnight and John C Cullen was patrolling the beach. It was a particularly foggy night when he came upon three men that said they were run aground fishermen. It seemed like a believable story until one of the men yelled in German and the leader of the group asked Cullen if he had a father and mother that would grieve for him. The leader then proceeded to say, “I wouldn’t want to have to kill you.” Cullen realized that this was a good time to find a way out since he wasn’t carrying a weapon. Cullen was given 300$ to forget what had just happened and took the money (which was actually 260$). He immediately alerted authorities. 

When the fog cleared some of the items found buried in the sand were a Nazi swastika, bombs, and sabotage devices.  The plot was foiled when the leader of the group turned himself in and revealed what their plan was. 

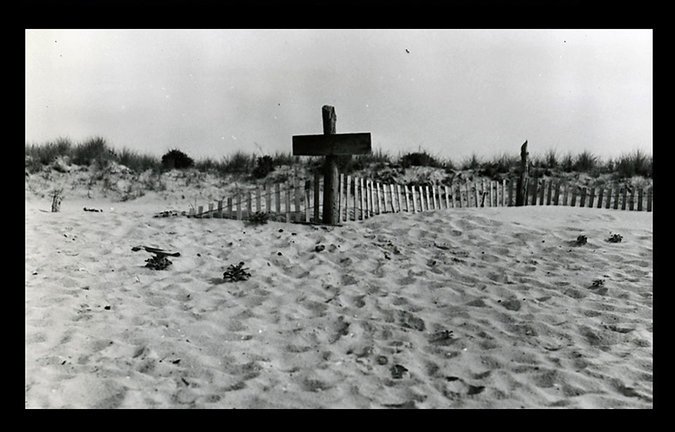
Cross marked where explosives were

Sand Pounders

Since I’ve gone over a bit of the background info here’s where the horses come in. 
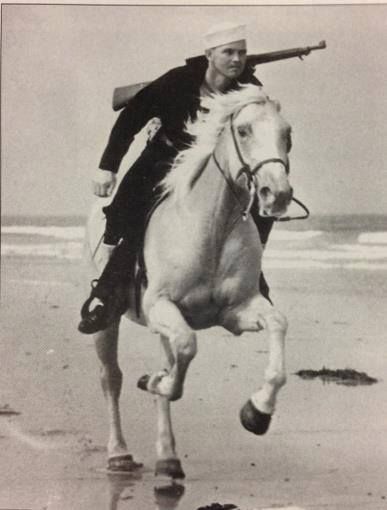
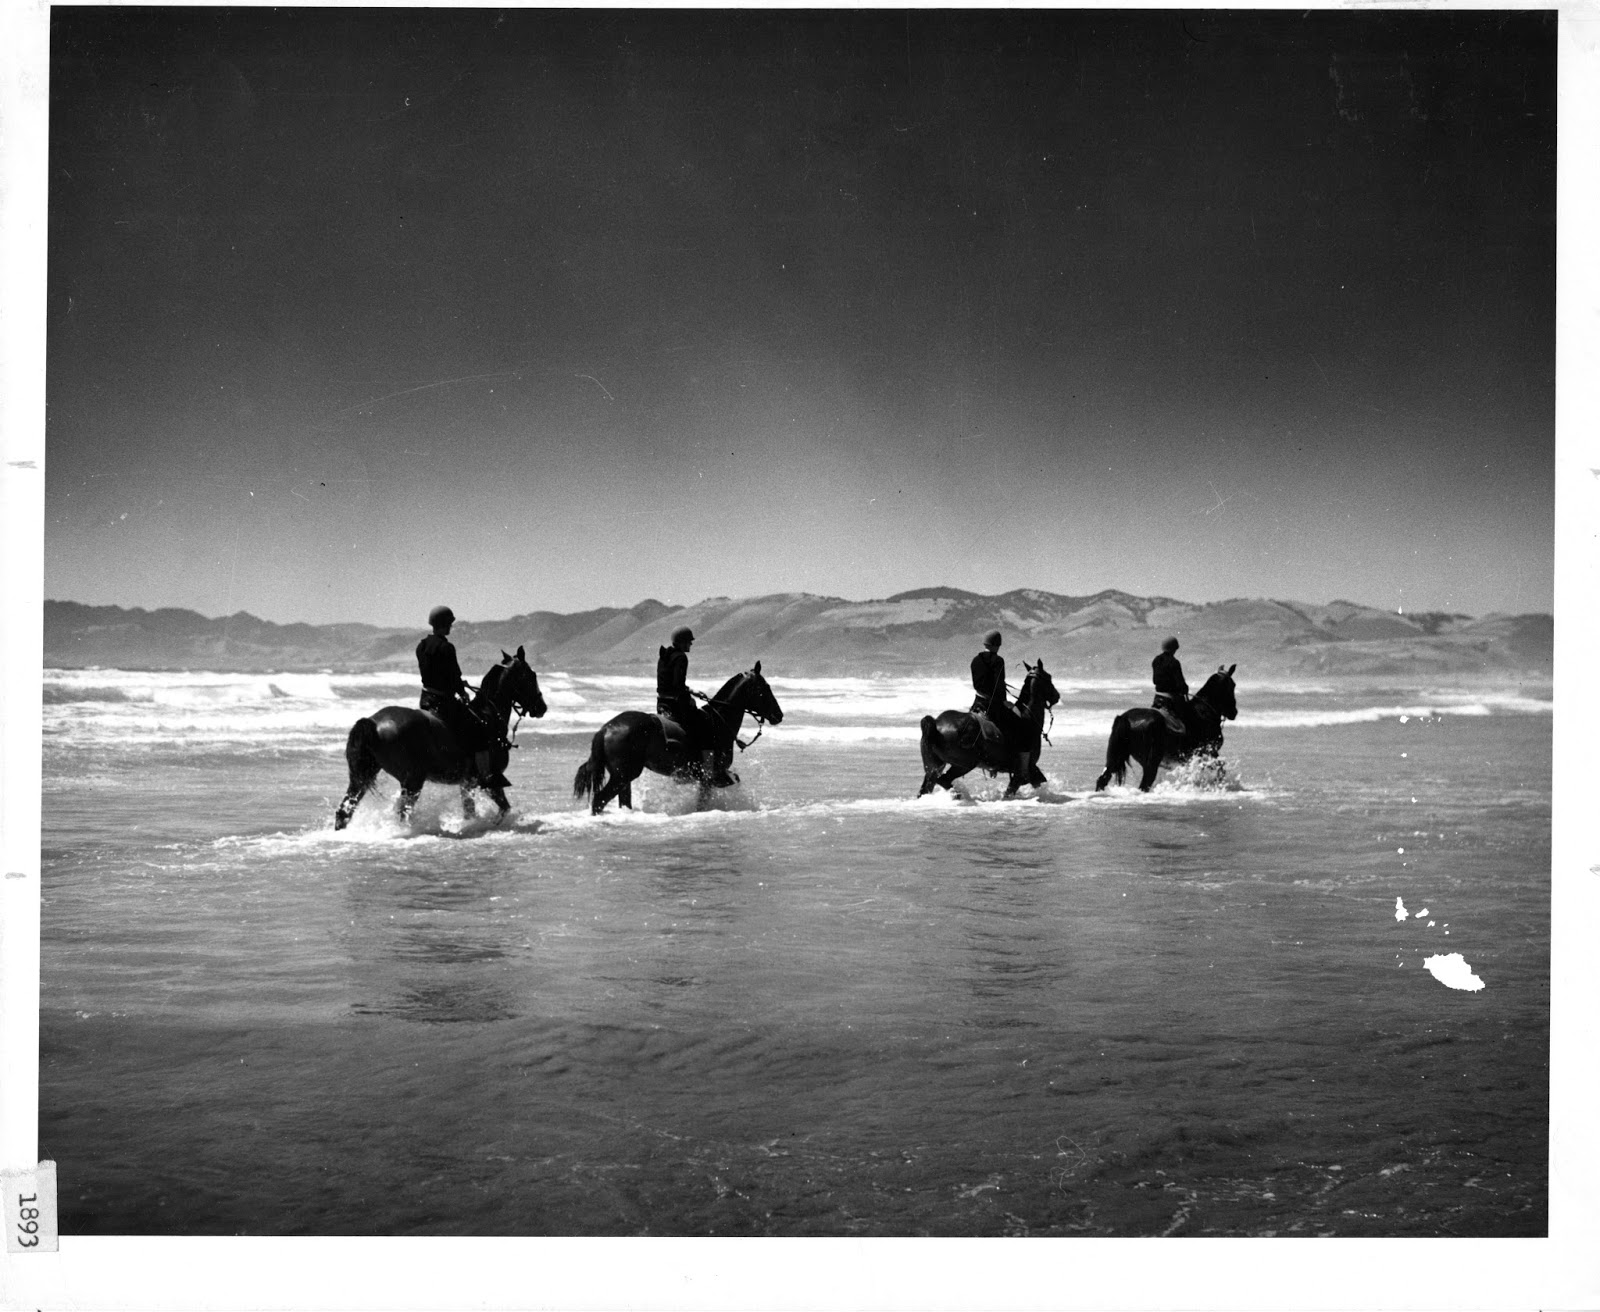
In September 1942 horses were authorized to be used in the beach patrol. They were from the US Army and the tack came from the Army Remount Service. The Coast Guard supplied the soldiers’ uniforms. It was the first and last time the Coast Guard used horses.
Horses could cover more ground at a faster pace then men on foot and they could also carry more weight, like the 35 pound radio transmitter. Dogs were also brought in as well to help guard the beach. They became known as the “Sand Pounders.”
Photo Credit: US Coast Guard


The goal of the patrol wasn’t to take on the enemy. 

Coast Guard Historian, Chris Havern said, “While it was not their mission to repel an invasion from the sea, the Coast Guard beach patrols performed a vital function insofar as the morale of the America people was concerned. The beach patrols provided a presence that reassured the American home front that they were being protected by a vigilant armed force.” 

Photo credit: National Park Service 


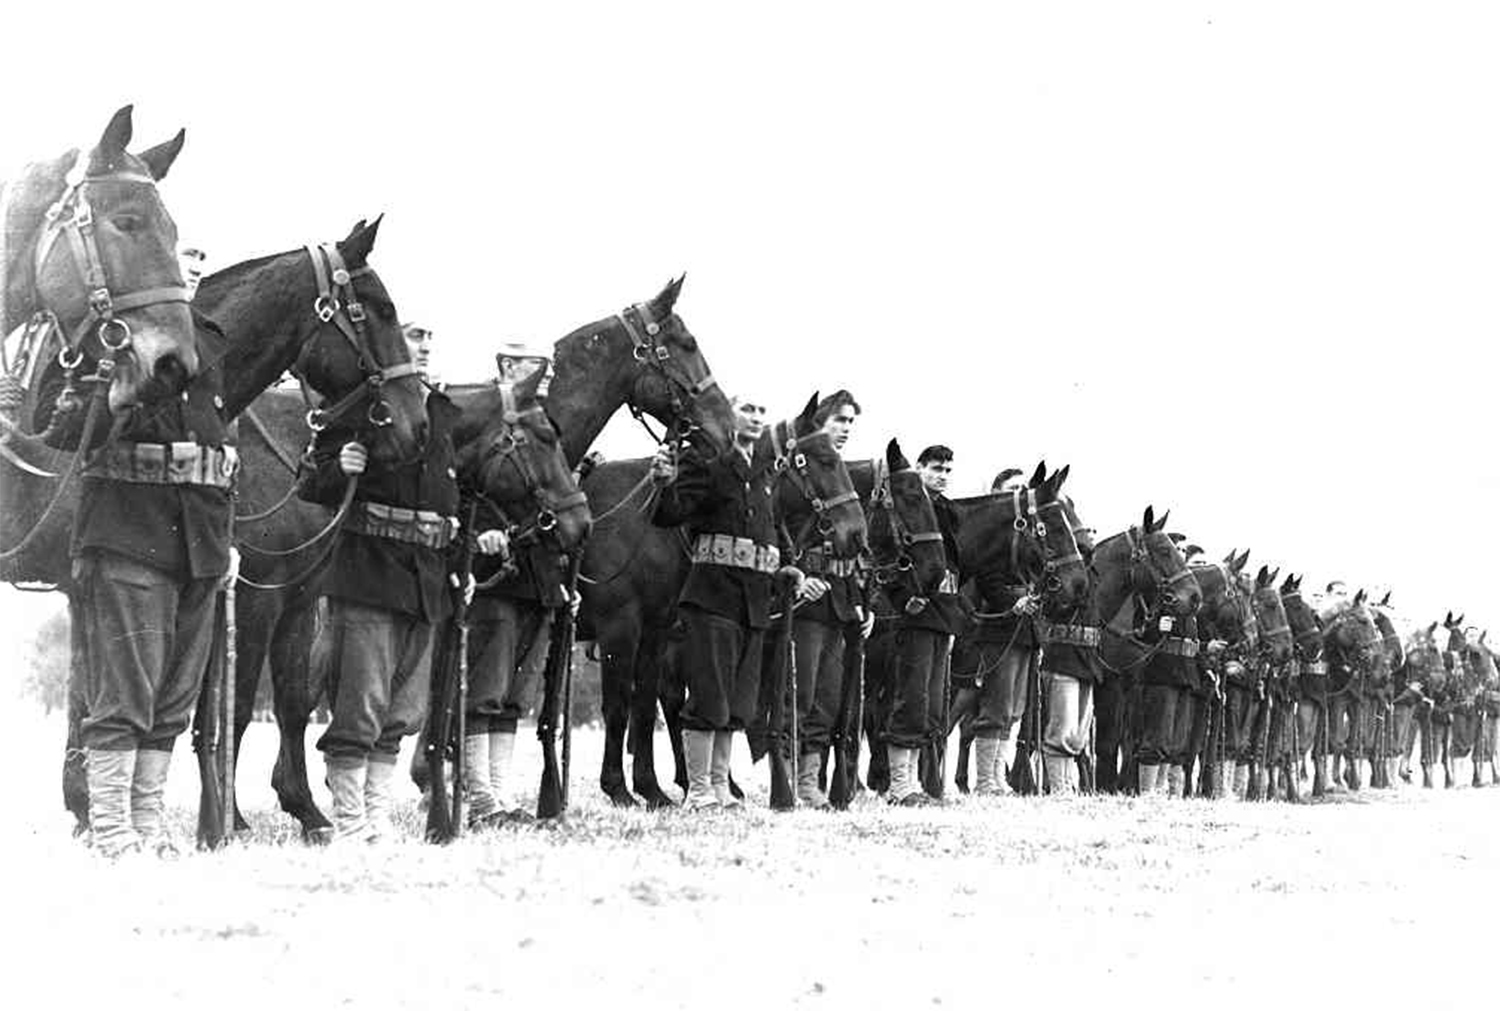
The mounted unit needed riders so a call was put out. They ended up with riders from a varied background like cowboys, horse trainers, jockeys, polo players, and rodeo riders. The mounted unit ended up being the largest part of the patrol. Over 3000 horses were a part of it.

Photo Credit: US Coast Guard


Training took place at Elkins Park Training Station, PA and Hilton Head, Sc.  They didn’t patrol all of the beaches of the United States though. The New England beaches weren’t safe during the winter and other spots in the country didn’t have the supplies to house horses. From the US Coast Guard blog, the spots where the mounted patrol worked the best were the mid-Atlantic, Florida, Oregon, and Texas beaches.

Photo credit: US Coast Guard
Mounted teams required at least two riders. The riders each carried a pistol and rifle. One carried a radio too. From researching I couldn’t find any evidence that the Sand Pounders ever actually thwarted an attack. Or even saw any sign of enemy U-boats or ships. Which is a good thing, even if it meant the men rode and rode and rode without seeing anything. 
The Sand Pounders lasted for two years. It wrapped up in 1944 since the threat of Nazi Germany or Imperial Japan attacking the United States shorelines had decreased to where it was nonexistent. 
The Army Remount sold the horses at public auction at the end of the patrol. 
Photo Credit: US Coast Guard

When I first read up on this I thought how interesting it was. Mounted beach patrols during World War II? And nothing bad ultimately happened? Perfect. It’s a very brief part of US history, but it’s a unique slice that hasn’t been repeated since. Next up I’ll talk about how this can be done in model form!

Sources:
John Cullen, Coast Guardsman Who Detected Spies, Dies at 90
Coast Guard Combat Veterans: Semper Paratus By James C. Bunch

So Many Pictures

I never thought I’d say that I’ve taken too many photos. But between the summer to today I have thousands of photos to deal with. I know that for some that’d be a day’s worth of photos, but not for me. There are more good than bad, so I’m happy about that. But still. So. Many. Pictures.
They span the summer which started with my first internship. The PA capital is beautiful.

Then the African American Museum in DC.

There’s plenty of barn photos.

And horse shows.

There were a few of those.

Breyerfest (which I still need to finish the final few posts about).

Philadelphia.

Plus any other interesting places I’ve gone to at some point.

Luckily I’m off for the next week for fall break, so hopefully I can get through most of them.

Fall Break Sale

I’m currently on fall break (finally).
Which means I have more time to do hobby things. So I’m pre-selling some custom nameplate halters in my Etsy store.  These would be perfect for gift giving or even for yourself!

I’m pre-selling 6 halters. Depending on my week I may open it up to more.
This is my first time putting up custom orders in my etsy shop, so here’s how I’m doing it.

There are three sizes available (Sorry, no smaller scales this time!). Each halter will have a three-hole slotted rings and two roller and tongue buckles.
The sizes are:

  • Small Traditional (Will fit Misty, Newsworthy, Weathergirl and similarly sized models)
  • Medium Traditional (Will fit Lady Phase, Show Jumping Warmblood, Roxy, and similar sized models)
  • Large Traditional (Will fit Wintersong, Cleveland Bay, and similarly sized models)
I also have numerous leather colors available. 
They are:
  • Black
  • Brandy
  • Cerise (Dusky Pink)
  • Navy Blue
  • Red
  • Whisky
  • Purple
Include the following information in the “Note” section
  • Hardware Color (Gold or Silver)
  • What you want on the nameplate halter (up to 16 characters, including spaces)

Each halter is 35$ plus shipping and handling.
If you’d like a nameplate halter of your own, follow this link, or the one at the very beginning of the post. These are first come first served and will be perfect Christmas gifts!

How To Prep Leather Lace

One of the most important parts of tack making is prep work. You can’t have a nice finished product if the material used is sloppily prepped. Prepping leather is far from my favorite thing to do, even if I do love the end result.
Leather lace is different from cow hide. It generally doesn’t need to be dyed, sealed, or split. It’s finished but not enough for a hobbyist. To make lace model horse friendly, one must prep it. It’s one of those skills that applies to all aspects of tack making.

Supplies

Gum Tragacanth

This is used for sealing and smoothing your leather. It has a gel like consistency and you don’t need to use a ton on the lace you’re prepping.

Safety Beveler

This is what I use to skive/thin the leather. IT’S THE BEST THING EVER. I like my blade to be a little bit dull, so whenever I get a new blade I use it to thin large pieces of tooling leather before using it on lace. 

Rivet Maker Hobby Tool Master Tools Trumpeter Scale Model Accessory

I use this to make faux stitch marks on lace. It adds the next level of detail. I used to use another one until I came across this one because it has a higher marks per inch. I did modify mine so the teeth of the wheel can dig into the leather a bit more. I took the outer layer off, which can be seen in the video at the bottom of the post.

X-Acto Knife

I use this to cut lace and cut away any fuzzy bits. You can get one of these at pretty much any craft store. The blade size doesn’t really matter. I never spend a lot of money on these since I have a habit of misplacing them!

Leather Lace

I use Kangaroo Lace. I find that it’s tighter and more flexible than lace you buy at craft stores. I also like it better than calf/cow leather. If you’re serious about tack making I recommend buying higher quality materials. It’ll leave you frustrated to be in the process of learning a new skill while also battling subpar materials.
There are plenty of places to buy lace. Tandy used to carry it, and sometimes you can find a spool of it for sale.  They had nice Kangaroo lace. The last time I stocked up on lace I got it here. The seller was incredibly nice and even sent me extra lace and pieces of Kangaroo hide.

This is Tandy Kangaroo Lace

Sand Paper

I use this to get the leather to be even throughout the whole piece. I just buy the packs of it at my local dollar store and it works perfectly fine.

The Steps

To start, take a piece of lace and the skiving tool (Safety Beveler). You want to thin the rough/off side, and not the smooth side.  I thin the leather to about half of its thickness. You want it thin enough so that it drapes nicely but not so thin that it’s like paper. Paper thin lace has its place but not for the majority of tack making processes. Paper thin lace is more likely to tear and the thinness detracts from the realism of the tack piece. 

After you’ve thinned the lace, pull out the sandpaper. You’ll want to sand the leather until it’s even and consistent through the whole piece. Then pull out the Gum Tragacanth and rub some along the rough side of the leather. You don’t want to make the leather soaking wet. You just want enough so that the leather is smooth again.

Pull out your X-acto knife and cut away any fuzzy bits along the side of the leather. The nice thing about using the skiving tool is that it usually leaves the leather pretty smooth after thinning it. But you still want to be sure that there aren’t any loose fuzzy pieces hanging out along the side. 

The last part to prepping lace is to to stitch mark. You want it to line the outside of the lace and to be able to see the impressions. Being able to get the lines straight takes some practice. 

Once you’re finished with that your lace is ready for whatever tack project you want!

Video:

Every tack maker has his or her own particular way of skiving. Here are a few links to some other tack makers that share how they do it. 
Jennifer Buxton of Braymere Saddlery-Preparing Lace
Anna Helt of Dreamlite Design-Skiving Part One and Two

Feel free to let me know what you think about this! This is a new way I’m hoping to do how-to things, so any feedback would be great. :)