Organizing Your Collection

Model horses are like chips. You can never have just one. You keep getting more and more until one day you tell yourself, “I need to organize.” So here’s a how-to on it!
You’ll need a

  1. Binder ( size depends on the size of your collection)
  2. A computer and printer( excel works best for me)
  3. Patience
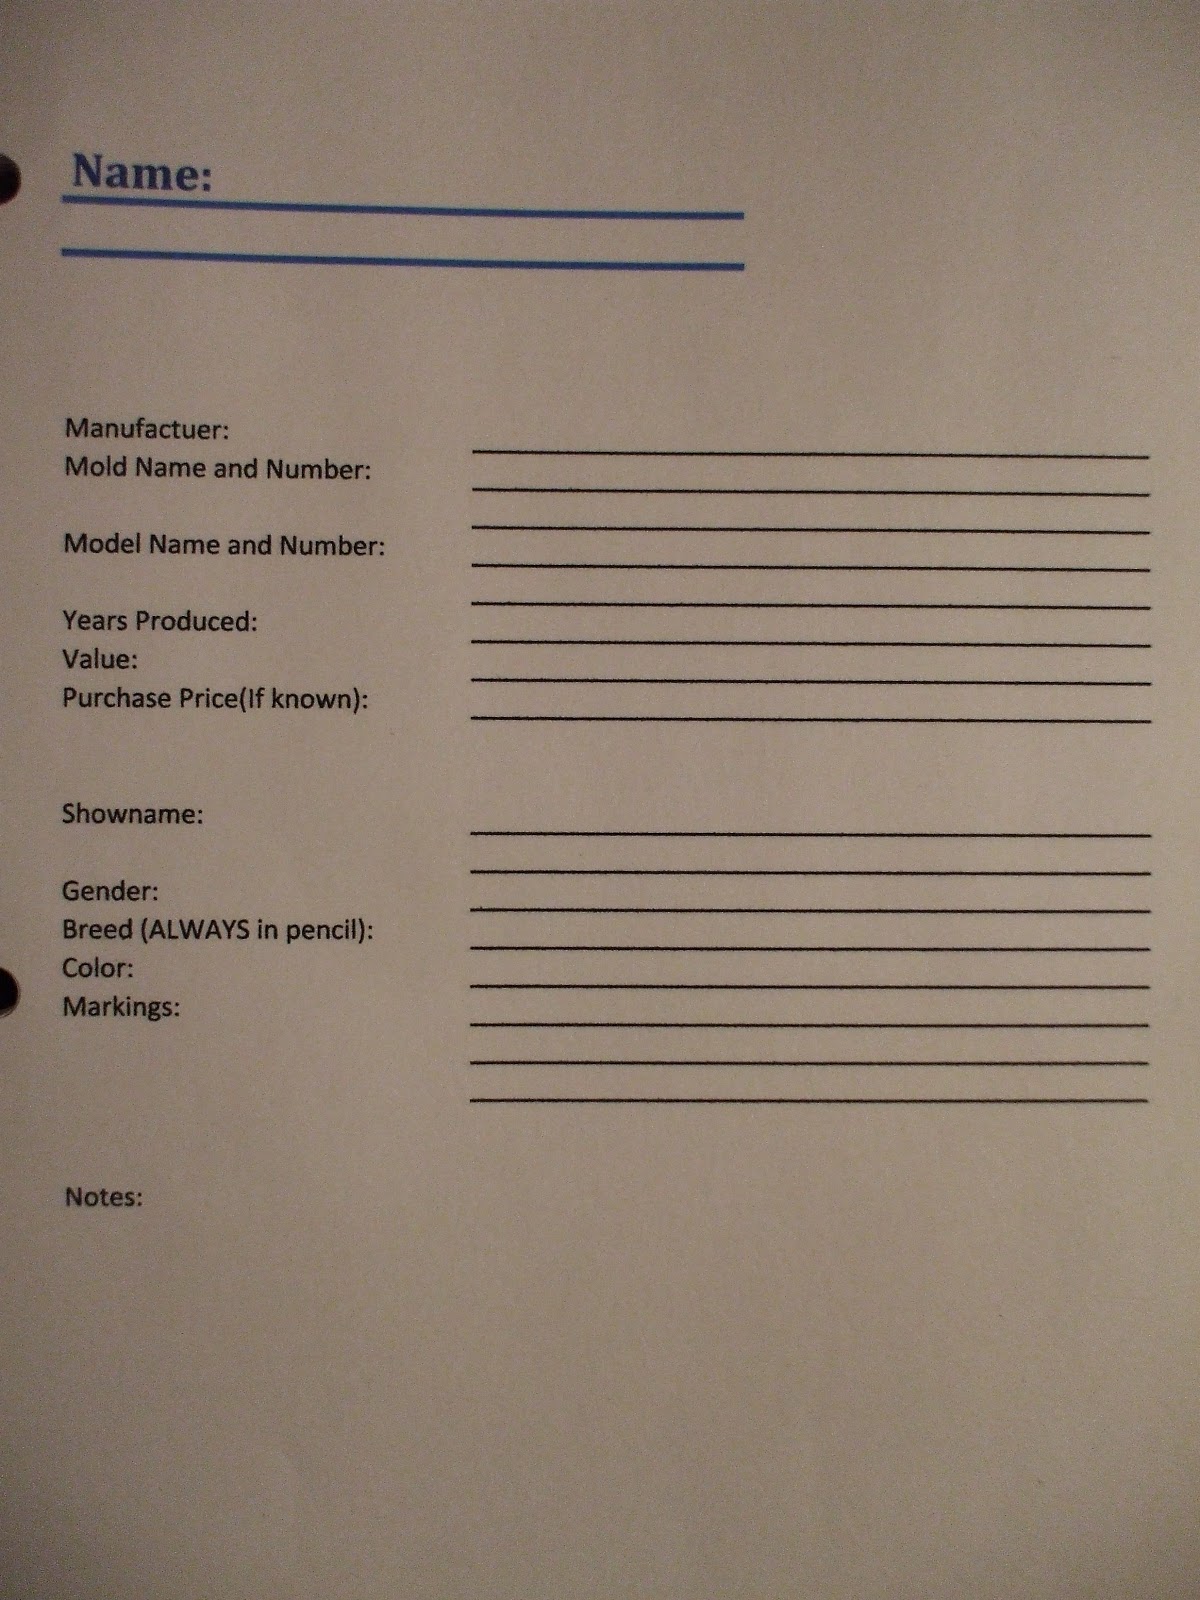
First, you need to make a form to use for all your models. Here’s the form I use.                                Manufacturer (Breyer, Peter Stone, etc) 
Mold Name and Number
Model Name and Number
Years Produced
Value( Always do this in pencil!)
Price Purchased (if known)
Show name
Gender
Breed
Color
Markings

Notes

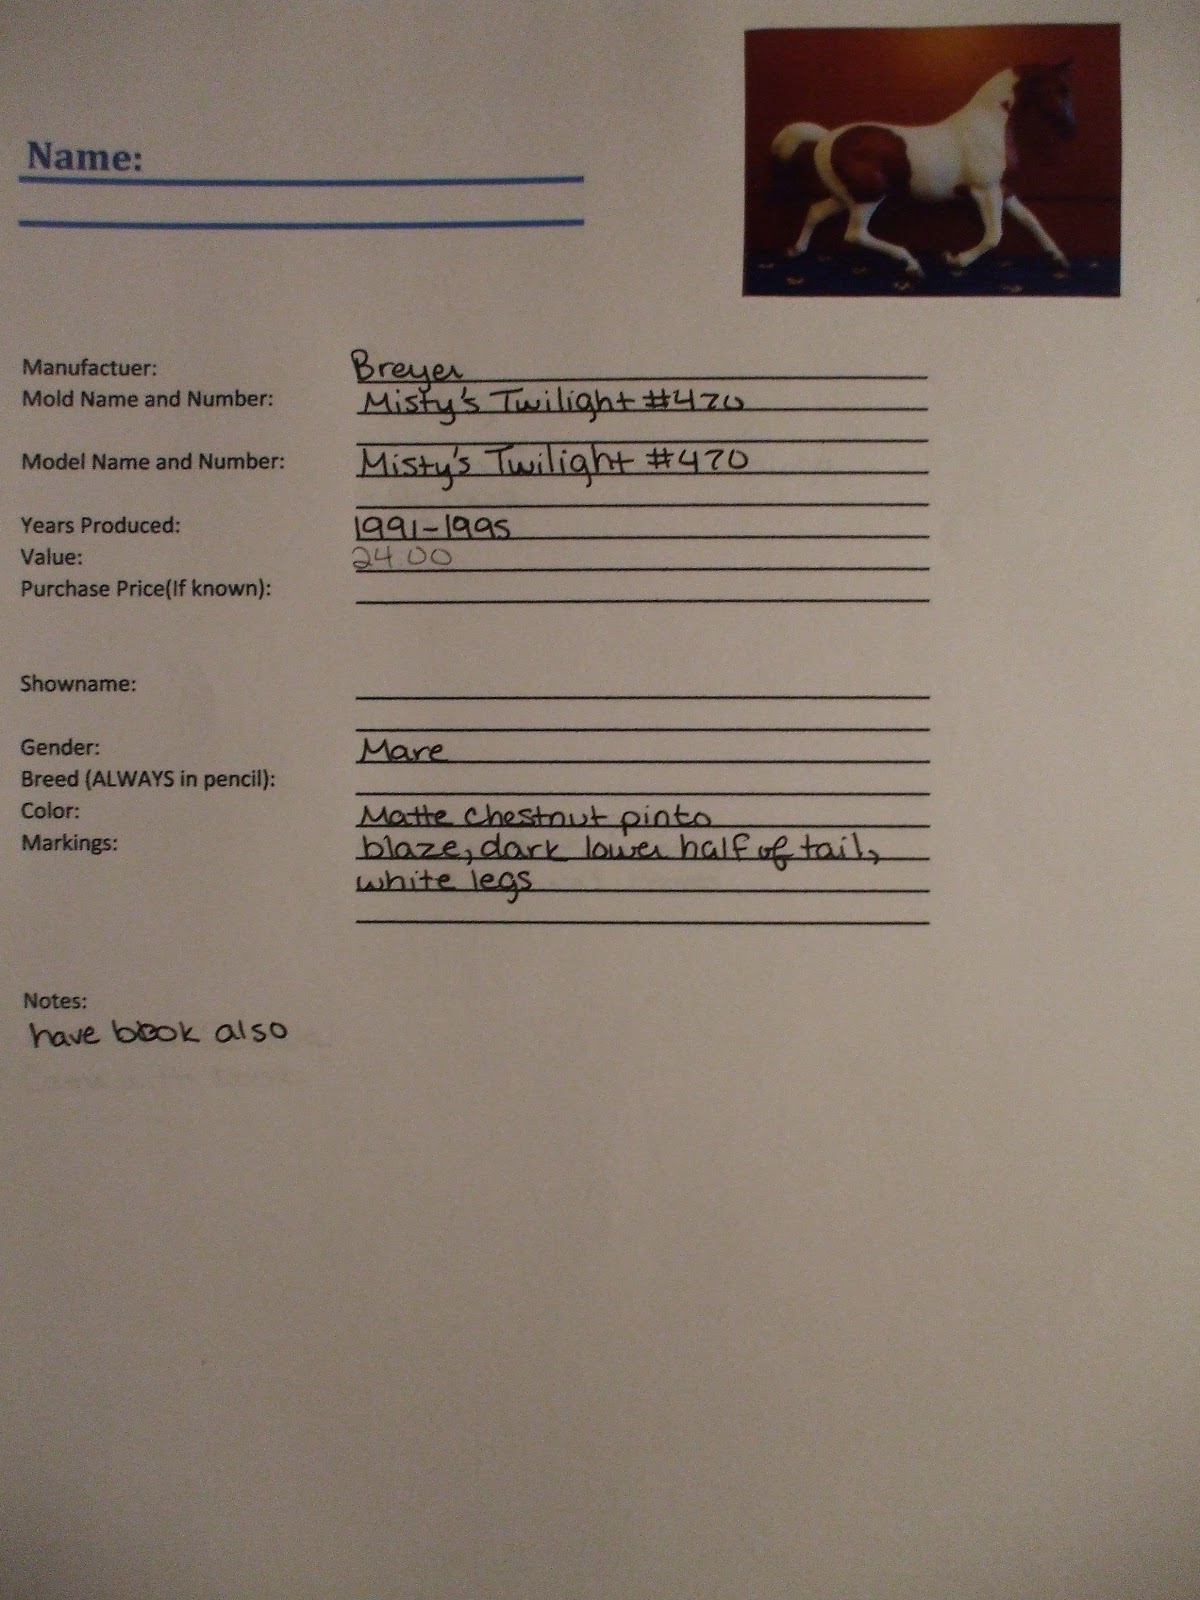
I type it all up in Excel, but any typing program should work. Save the blank and start printing! I include a small picture of the model and paste it in the upper corner of the sheet.

In the binder you can organize it in many ways. Breed types, names, series collections, the sky is the limit! 
I put mine in mold name order. I know my models better by mold.
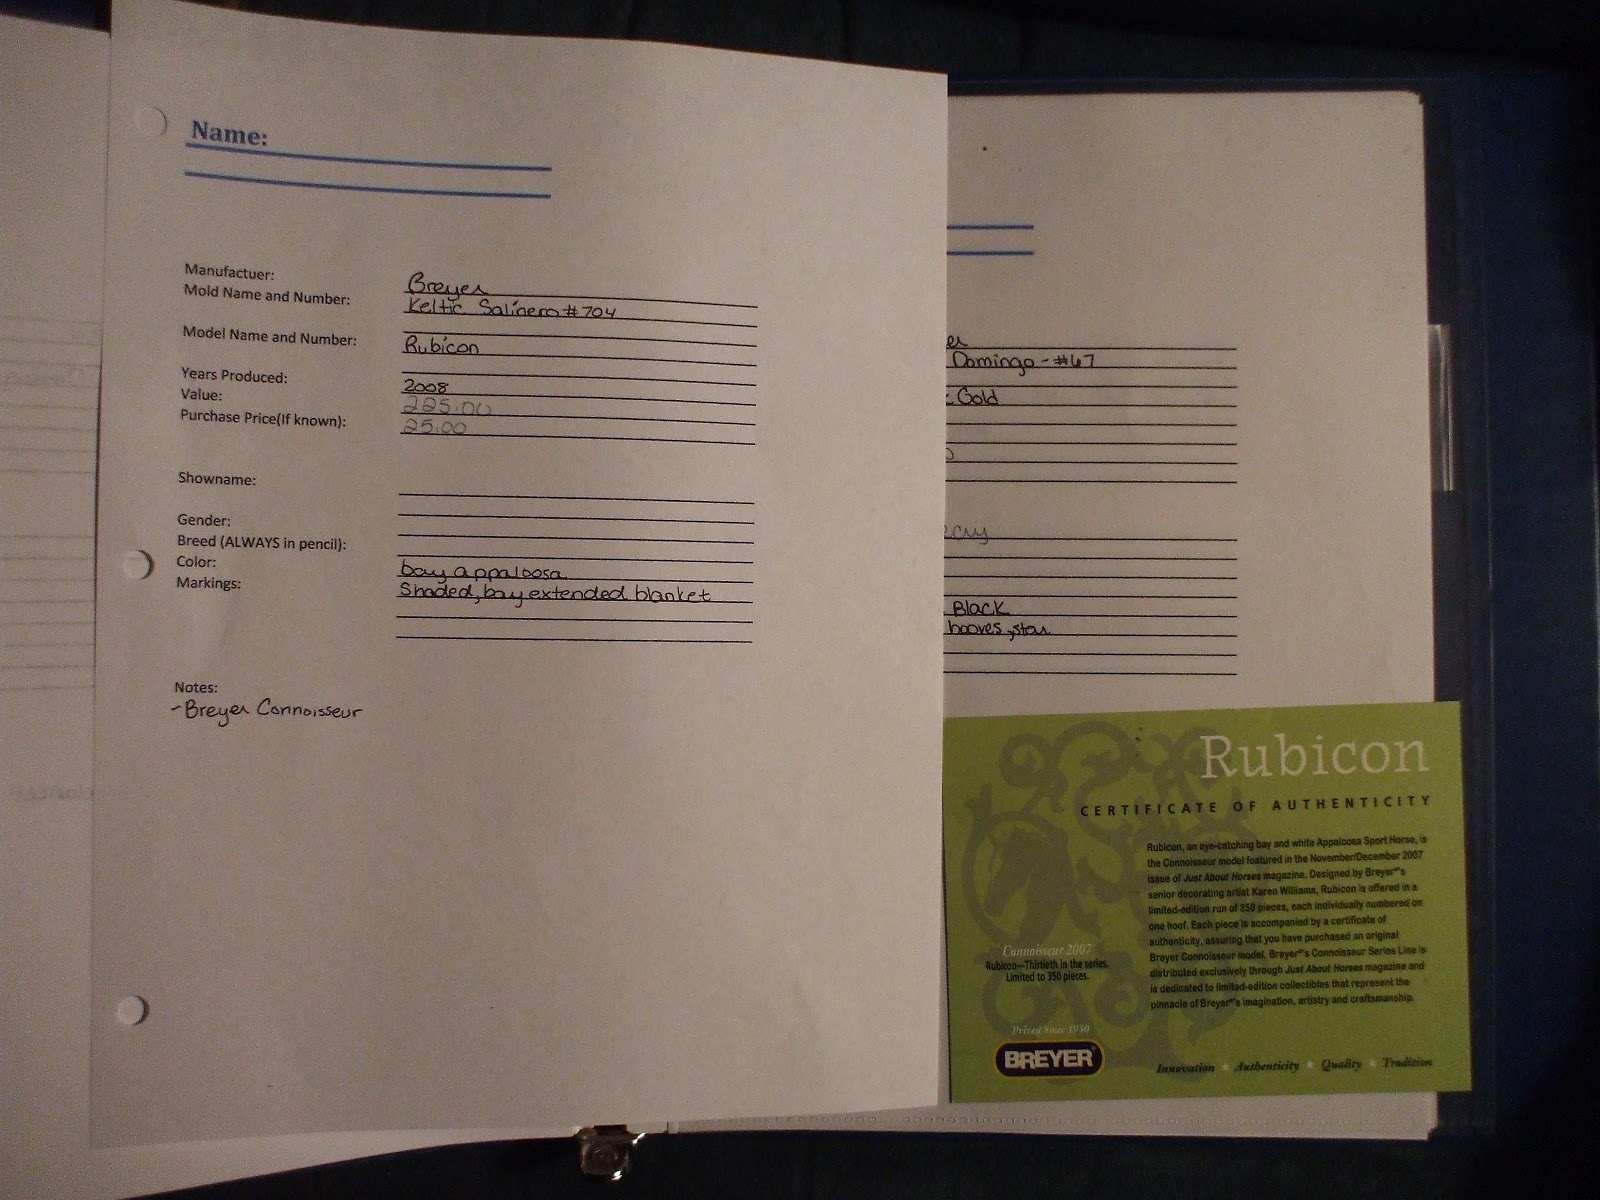
Some models have certificate or other important papers that go with them. Maybe even ribbons that a model has won.  I get a page prprotector, slip the paper  into it and stick it into the model’s page.

Now you can keep adding to your collections without worrying about keeping track!

Fixer-Upper

Repairs. Happens to everyone at some point, whether at a show or at home. My poor cart fell apart for multiple reasons. First, I didn’t make it sturdy enough. Second, I packed it extremely carefully going to my last show, but once the class was done I rushed to put it away and didn’t pack it well, a drastic difference from earlier.
Nevertheless, my cart needs fixed.

First I ripped off the rest of the remaining shafts, so I could replace it with complete new ones.
Next, I measured the new shafts, then chopped.

Then I took out super glue and baking soda and glued. It makes it strong!


Then sanded it until you couldn’t tell when the wood ended and baking soda super glue mix began.

Painted it.

While waiting for the shafts to dry, I took out my modeling paste,

and pasted it into the little grooves in my wheels. Since it dries so fast, I was able to sand and paint it before the shafts were done.

And glued the shafts back on.
Now it’s back together, like new!

The Low Down On Dolls

Ever have a setup that absolutely needs a doll(s) but they stifley sit and bring your setup down instead of up?Well here’s the how to on dolls!
A little remaking can do wonders with dolls.  What you’ll need is 1) a doll (breyer, or any type of jointed poseable doll) 2) a dremel with a sanding piece*  3) sandpaper 4) exacto knife
I’m going to be making a youth rider. I don’t use breyer youth dolls anymore, I use some brand of jointed play dolls that you can buy at regular toy stores. Next time I go to get some I’ll be sure to remember the name! *Just found out they are Paradise Horses dolls
Now here it is.

These are some of the creepiest dolls I’ve ever seen.
See?

I normally repaint the face after I’m done because of these doll’s creepiness, but you don’t need to if you don’t want to (maybe another how-to?) since this is a basic how-to on how to get basic riding dolls.

You need an unclothed doll. See in the thighs how thick they are? Since they’re plastic and not fleshy like us, the thighs and butt need to go.

Take out your dremel. I like to start it on low so the sander can “catch” onto the plastic first, before kicking it into high gear.  You want to thin down the plastic enough for the thigh to be flat, but not so thin it makes a hole in the plastic.

Oops.

Next it’s time to sand the butt. You don’t want to sand off a ton of it, but you do want to sand enough. Take a regular piece of sand paper and smooth everything down.

You can paint the hands to represent gloves .

 If you want your dolls to hold the reins correctly, you can grab your exacto knife and make a slit between the pinkie and fourth finger.

Valla! You’ve finished and now have a horse friendly doll!

*Warning-this how to does call for the use of a power tool. If you’re a minor be sure to ask your parents for permission.

The Name Game

Whenever I used to get my models tagged for a show, I used to run into a problem. Names. Yes names, not breed assignments.

 Names can be important. If called for a ribbon or rosette, you don’t want to it to be, “And the champion is Mr. Squooshie Ooshie” or so hard to pronounce you don’t even know what it is and have to use Google translator to hear it. So I made an answer. A Name Book. Here’s how.
First you need a binder. Pick a binder in whatever size you’d like, it all depends on how big of a name book you want.
I get out a spiral bound notebook next and break out the magazines too. Breed magazines work the best for me! Doesn’t matter the breed!

I go through the magazine and pick the names I like and write them down in the notebook, in no particular order.If you don’t have any magazines, break out the novels. Novels have plenty of good names, it all begins with the title. Not all books will have the ring of a name, but plenty do.
When done, I rip out the pages in the notebook and stick the papers in the binder.

When I use a name, I cross it out and place a tiny note of which horse it went to. You could also organize it by category e. titles of books, breed magazine, etc. Do what you like!
Thanks for reading! If you have any how-to’s you’d like for me to do, comment!